The content of this page has not been vetted since shifting away from MediaWiki. If you’d like to help, check out the how to help guide!
Overview
In addition to the default Phase Correlation-based pairwise shift determination, we offer some alternative methods and advanced parameterization, as well as non-standard grouping of the views in your dataset.
If you want to proceed straight to the next steps after calculating the shifts, we offer the same options under Stitching Wizard › Stitch dataset (expert) …
Advanced pairwise shift calculation
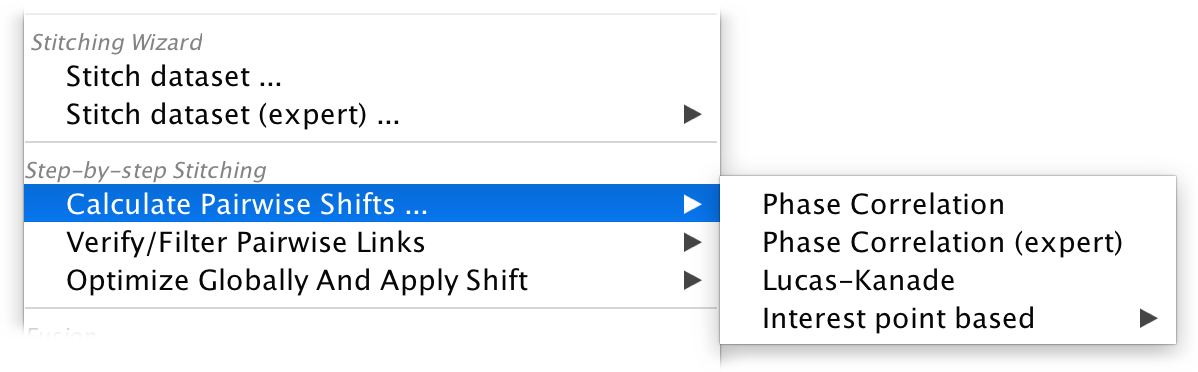
We currently support three different ways of calculating pairwise shifts.
We strongly advice to try the default Phase Correlation first, as it tends to give the most robust results in comparison to the more specialized methods below.
Advanced phase correlation
First, you will be asked for parameters for the phase correlation calculation:
- number of peaks to check: the output of the Fourier-based phase correlation is a phase correlation matrix (PCM) with, ideally, a single intensity peak corresponding to the shift vector between the input images. However, due to noise, there might actually be multiple peaks in the PCM. Each peak can also correspond to multiple (8) shifts due to the circular nature of the phase correlation, so we have to verify all possible shifts by calculating the cross correlation of the shifted images to determine the correct one. We can do the verification for not just the highest PCM-peak, but the n highest peaks. This parameter specifies how many peaks to consider. Increasing it might improve results in very noisy images, but it will also increase the computation time.
- minimal overlap: when checking multiple possible shifts, we can immediately discard some of them if the resulting overlap is to big. You can increase this parameter to restrict the results to small shifts (minimal overlap of 100 would correspond to NO shift) if you already have a rough alignment of the views.
- subpixel accuracy: whether to localize the peaks in the PCM with subpixel accuracy or not. This slightly increases the computational burden, but is especially important if you use downsampled images.
- interpolate subpixel cross correlation: when verifying subpixel-localized PCM-peaks, you can either calculate cross correlations with the nearest integer shift or, for maximum fidelity, on linearly interpolated images. Doing this on the fly increases the computational load quite a bit and the differences in results are typically negligible, so we recommend leaving this off.
- show expert grouping options: if you activate this, you will be asked which views to include in the calculation and how to group them in another dialog. See the Advanced view grouping section below for details.
Next, you will be asked how to treat grouped views and which downsampling of the images to use. This is the same as in the simple mode, so please look to the corresponding page for details.

Iterative alignment via Lucas-Kanade algorithm
The Lucas-Kanade Algorithm can align two images by iteratively minimizing the difference between them via Gradient descent an the transformation parameters. It can in theory be used for more complex transformation models, such as affine transforms, but at the moment, we restrict it to a simple translation. Lucas-Kanade tends to produce good, subpixel-accurate alignments. It requires, however, that the images are already roughly aligned, otherwise the optimization often fails to determine the correct shift.
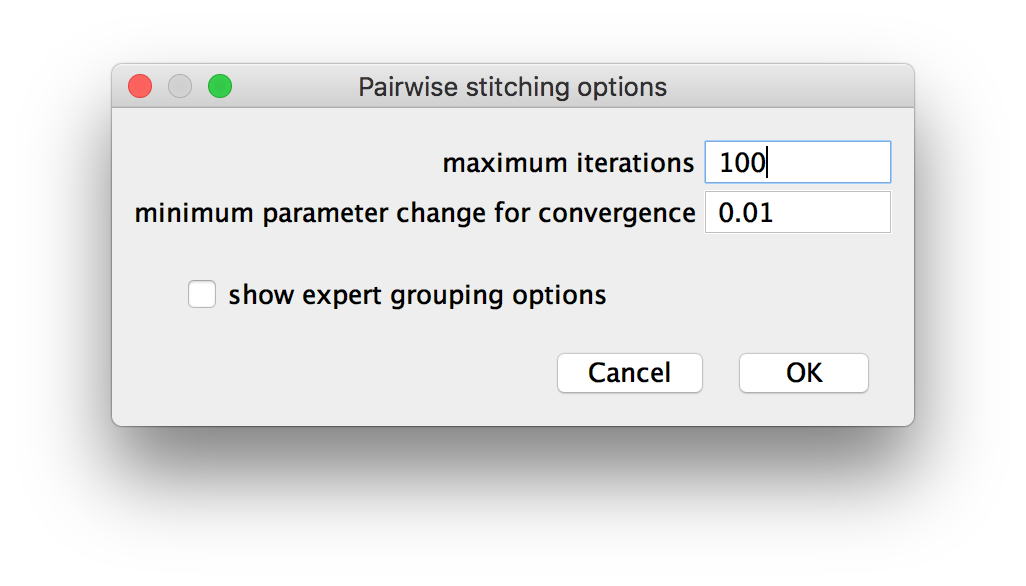
First, you will be asked for three parameters:
- maximum iterations: how many Gradient descent iterations to run. You might want to increase this parameter if the prior alignment is far off (however, the method generally performs poorly in such cases) or if you set the minimum parameter change very low. If no optimum was found after the maximum iteration number, we consider the alignment to have failed and return no shift for the image pair.
- minimum parameter change for convergence: the optimization will run until the change in length for the current estimate for the shift vector falls below this threshold (in pixels). Lower values might provide more accurate alignments but increase computation times.
- show expert grouping options: if you activate this, you will be asked which views to include in the calculation and how to group them in another dialog. See the Advanced view grouping section below for details.
Next, you will be asked how to treat grouped views and which downsampling of the images to use. This is the same as in the simple mode, so please look to the corresponding page for details.
Interest point-based shift calculation
Finally, you can use the interest point-based registration of the Multiview-Reconstruction to determine pairwise shifts. In the right-click menu, you can choose whether to do the alignment with new interest points or existing interest points (if they exist).
Also in the menu, you can activate or deactivate Show expert grouping options. If it is activated, you will be asked which views to include in the calculation and how to group them. See the Advanced view grouping section below for details.
If you chose to detect new interest points, you will then have to proceed through the steps of interest point detection. Please refer to the corresponding section of this Wiki for detailed instructions.
Next, the image pairs will be registered using the interest points. Please refer to the corresponding section of this Wiki for detailed instructions. Note that the transformation model is restricted to a simple translation at the moment and you can only use the following strategies:
- Fast descriptor-based (rotation invariant)
- Fast descriptor-based (translation invariant)
- Precise descriptor-based (translation invariant)
Advanced view grouping
In the expert mode of the stitching steps, we offer advanced options for view grouping (in addition to the channel and illumination grouping available via the UI) and batch processing.
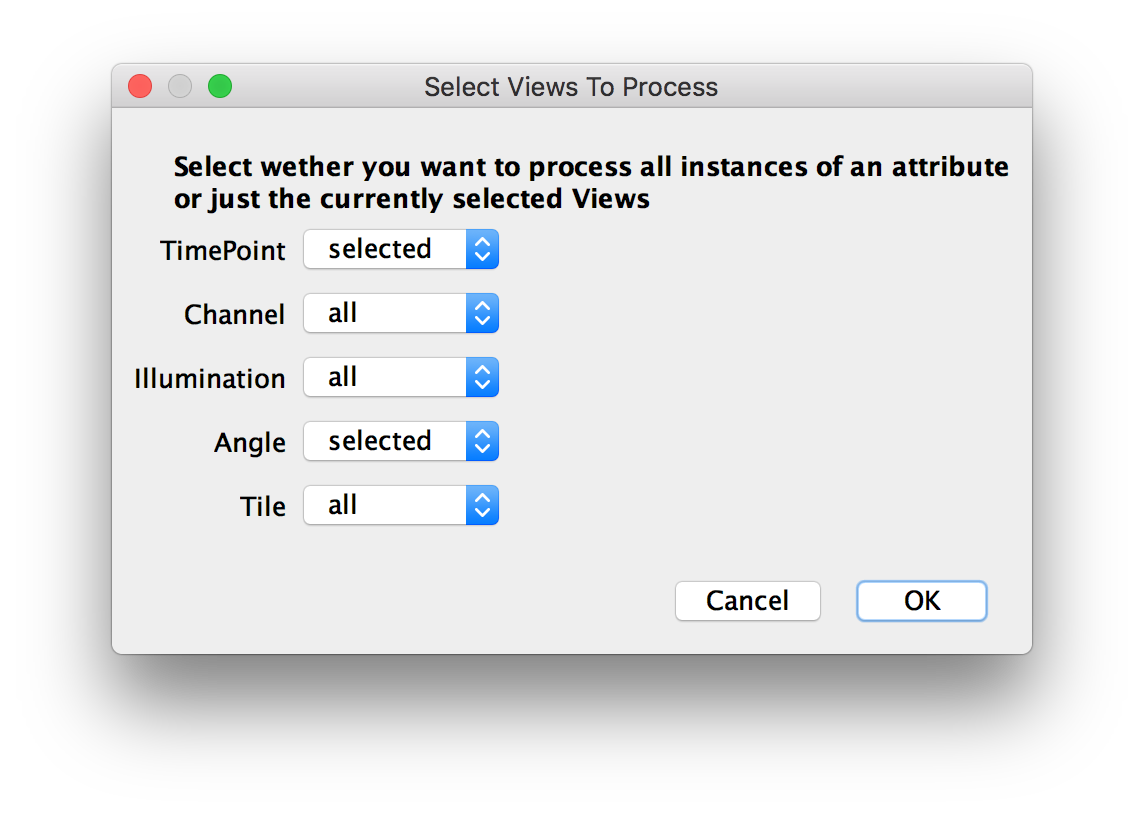
In the next two dialogs, you will be asked which views to include in the calculations and how to group them.
- In the first dialog, you can select whether all instances of an attribute or just the currently selected views should be processed. For example, in the example below, we use all Channels, Tiles and Illuminations, but only for the currently selected timepoint and angle.
- Select how to process the different attributes. For example, in the figure below, we will treat TimePoints and Angles individually, which means that we will compute shifts between view pairs separately for each time point and angle. Likewise, we group Channels and Illuminations, meaning that we will combine all channels and illumination directions for a tile into one image beforw calculating shifts. Finally, we compare Tiles, which means that shifts will be calculated between tiles.
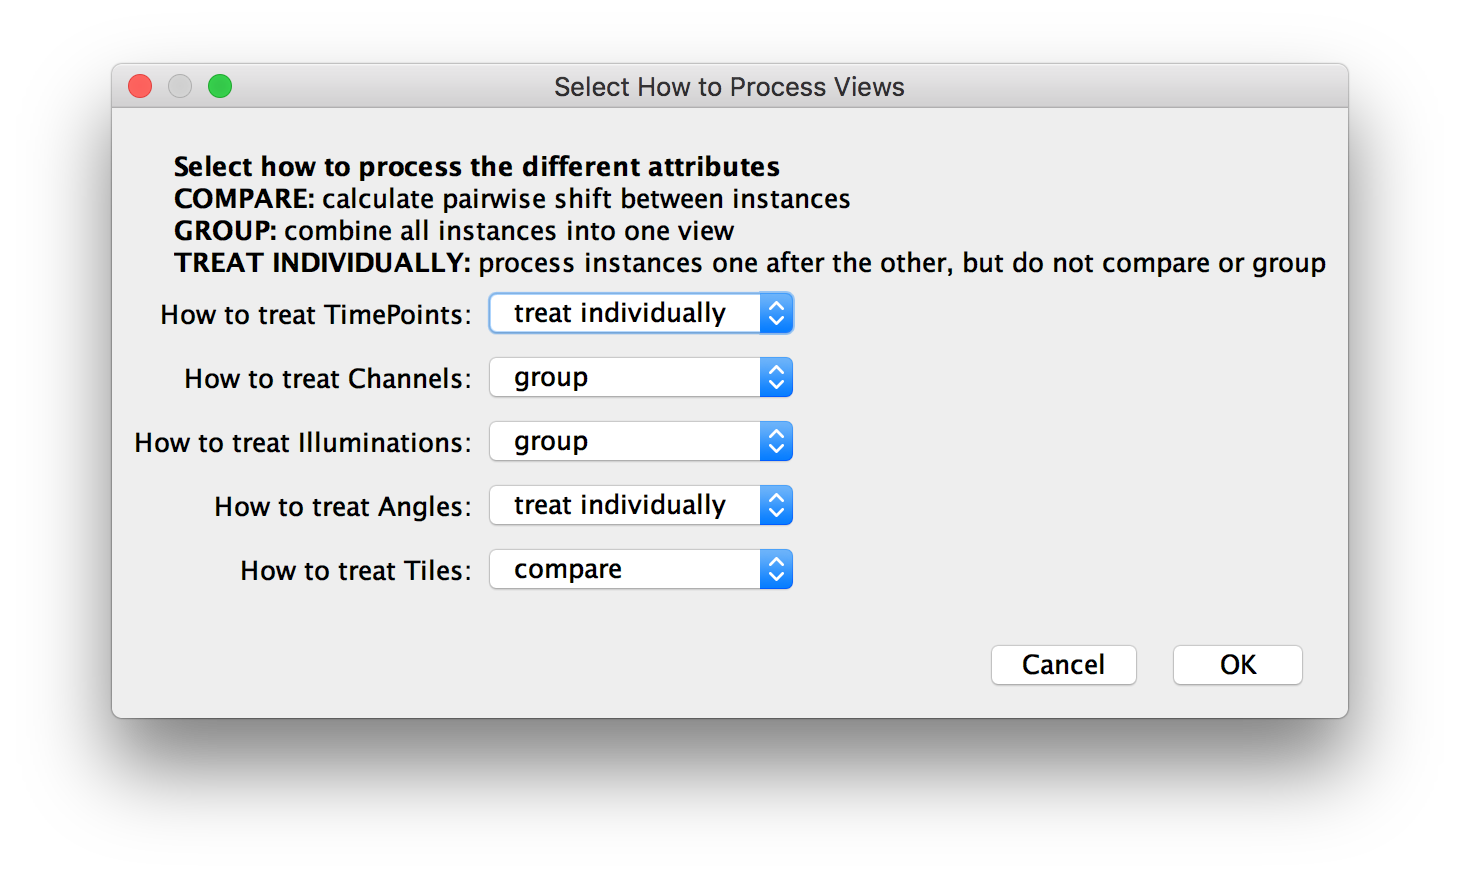
Theoretically, you can use the second dialog to generate arbitrary groupings of the data, e.g. compare Channels but group Tiles for chromatic shift correction. Not all of these groupings might make sense and not all of them can be properly visualized in the UI (e.g. for interactive link preview). Note that you have to use for the same grouping of the data in the subsequent global optimization step.
Go back to the main page