The content of this page has not been vetted since shifting away from MediaWiki. If you’d like to help, check out the how to help guide!
Overview
While the Interest Point-based registration is quite resistant to outliers and will typically work even with few actually corresponding points, there are situations in which you might want to manually curate the detected interest points:
- in very heterogeneous samples you might have a lot of spurious detections that you want to exclude.
- for extracting Point Spread Functions (PSFs) for Deconvolution, you want to only use detected beads, but not detections in the sample itself.
We offer a variety of ways to manage interest points in MultiView mode, which can be found in the main menu under Interest Points.
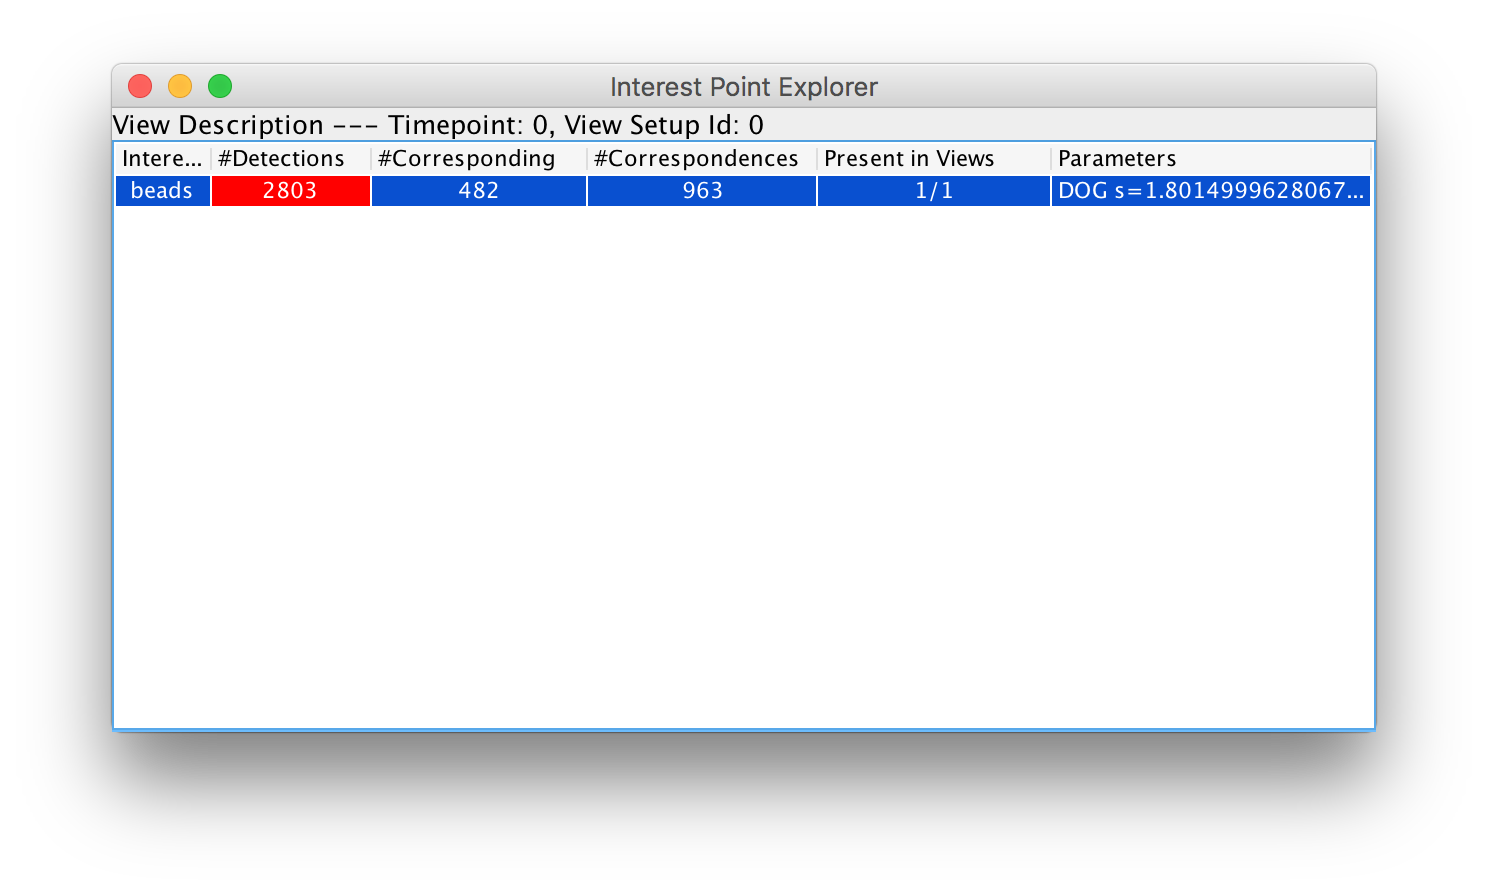
Interest Point Explorer
If you click Interest Point Explorer (on/off), a new window will open that shows the different interest points that were detected in the selected view(s). The table will list:
- the Name of the interest points
- the Number of interest points
- if you already performed registration using the points, the Number of Corresponding points, i.e. the number of points that were found in at least one other view, and the Number of Correspondences, i.e. the number of points in other views that could be matched to the selected points (note that this number can be larger as one point might have correspondences in multiple other views).
- in how many of the selected views points are present
- the Parameters used for detection
You can right-click on a line in the list and click Delete to delete the interest points.
 all interest points as an overlay in BigDataViewer
 corresponding interest points as an overlay in BigDataViewer
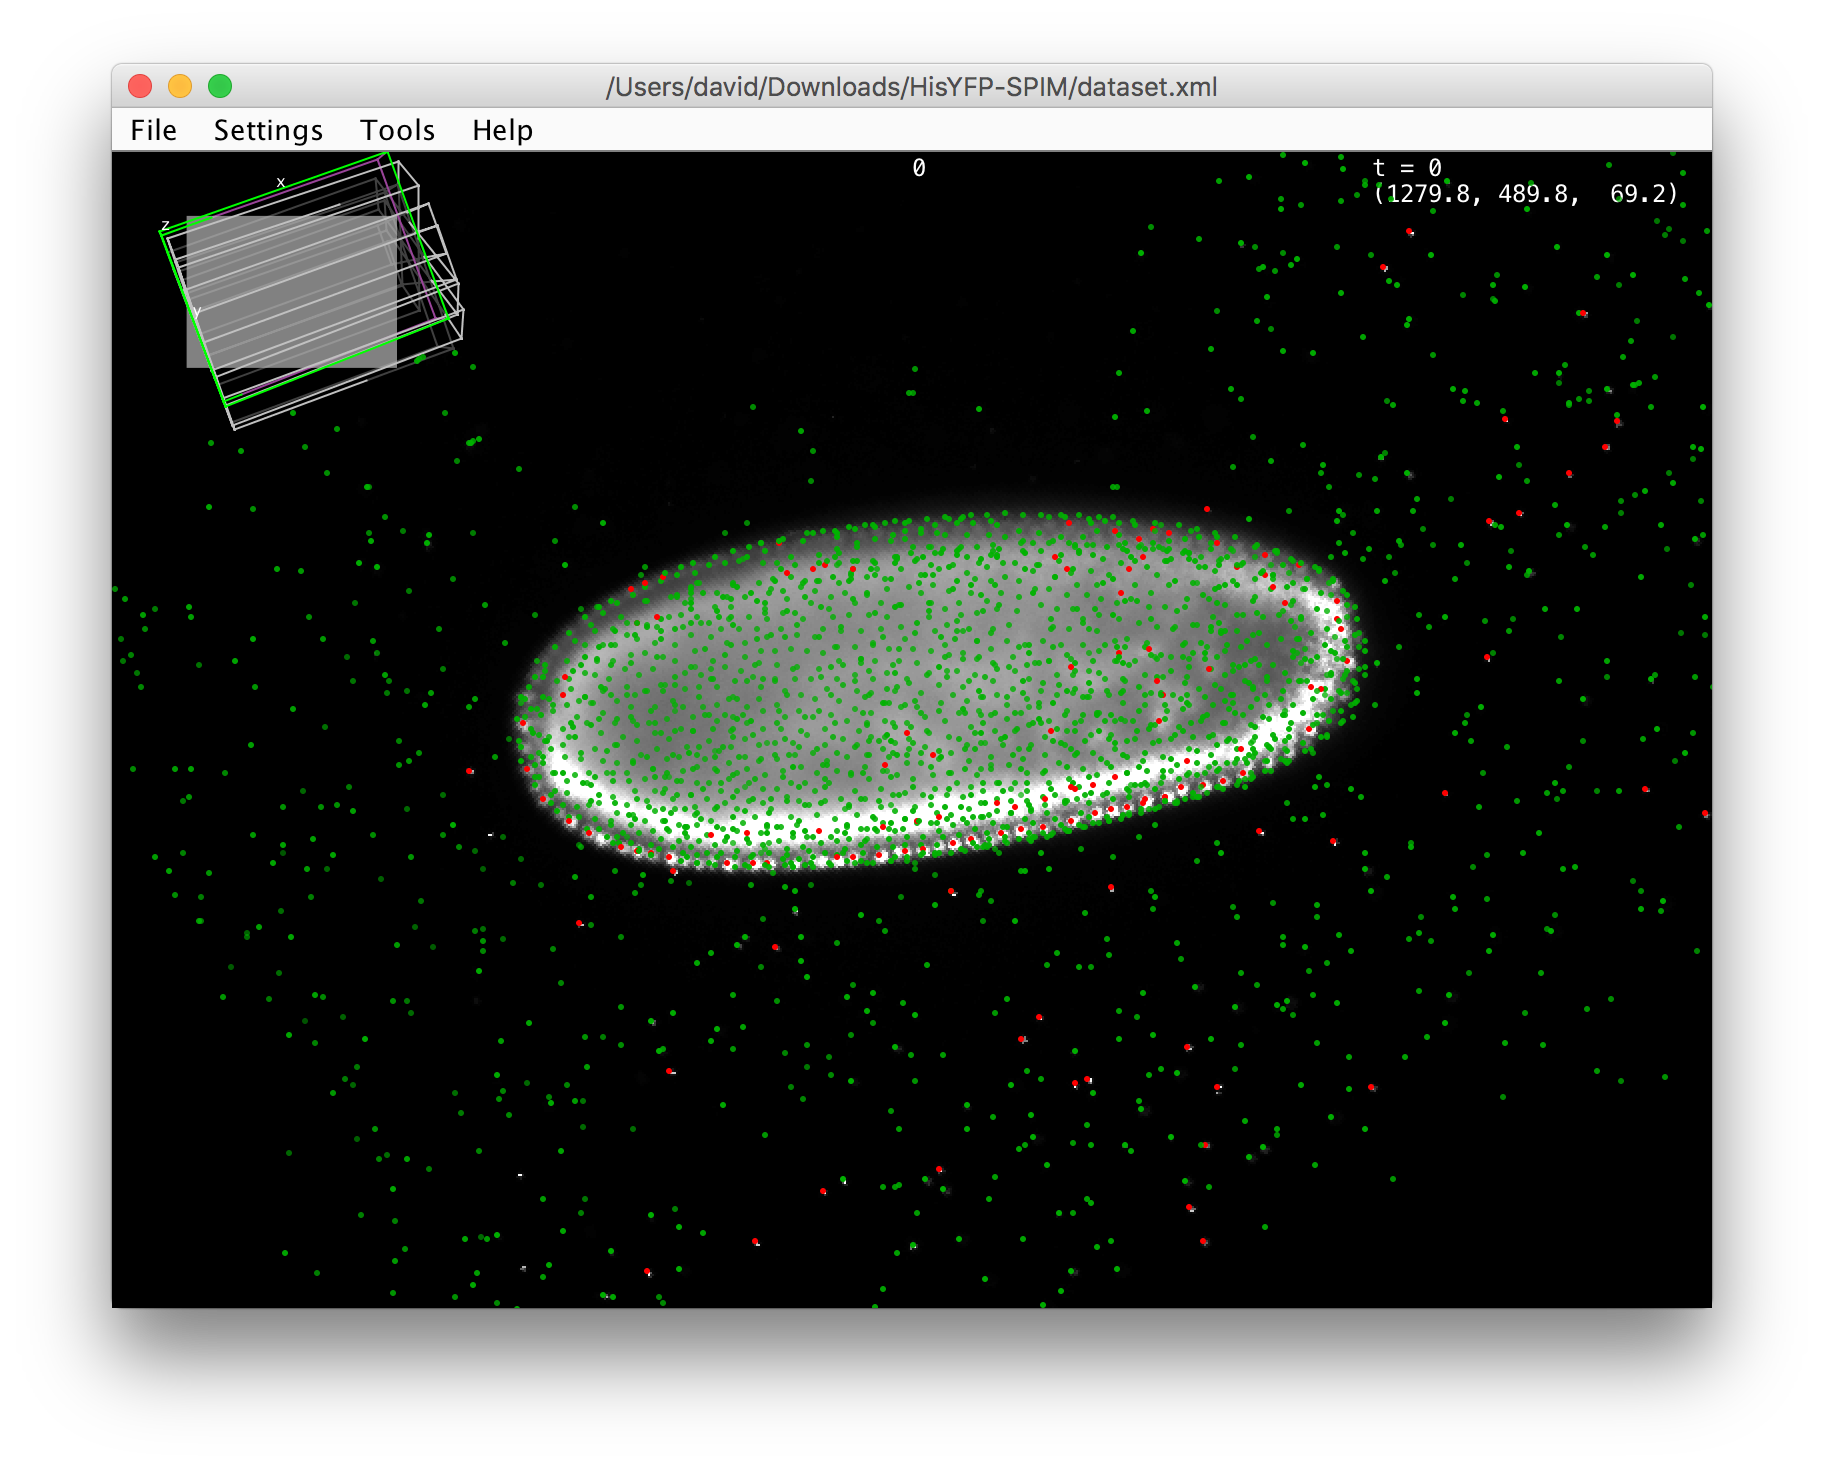
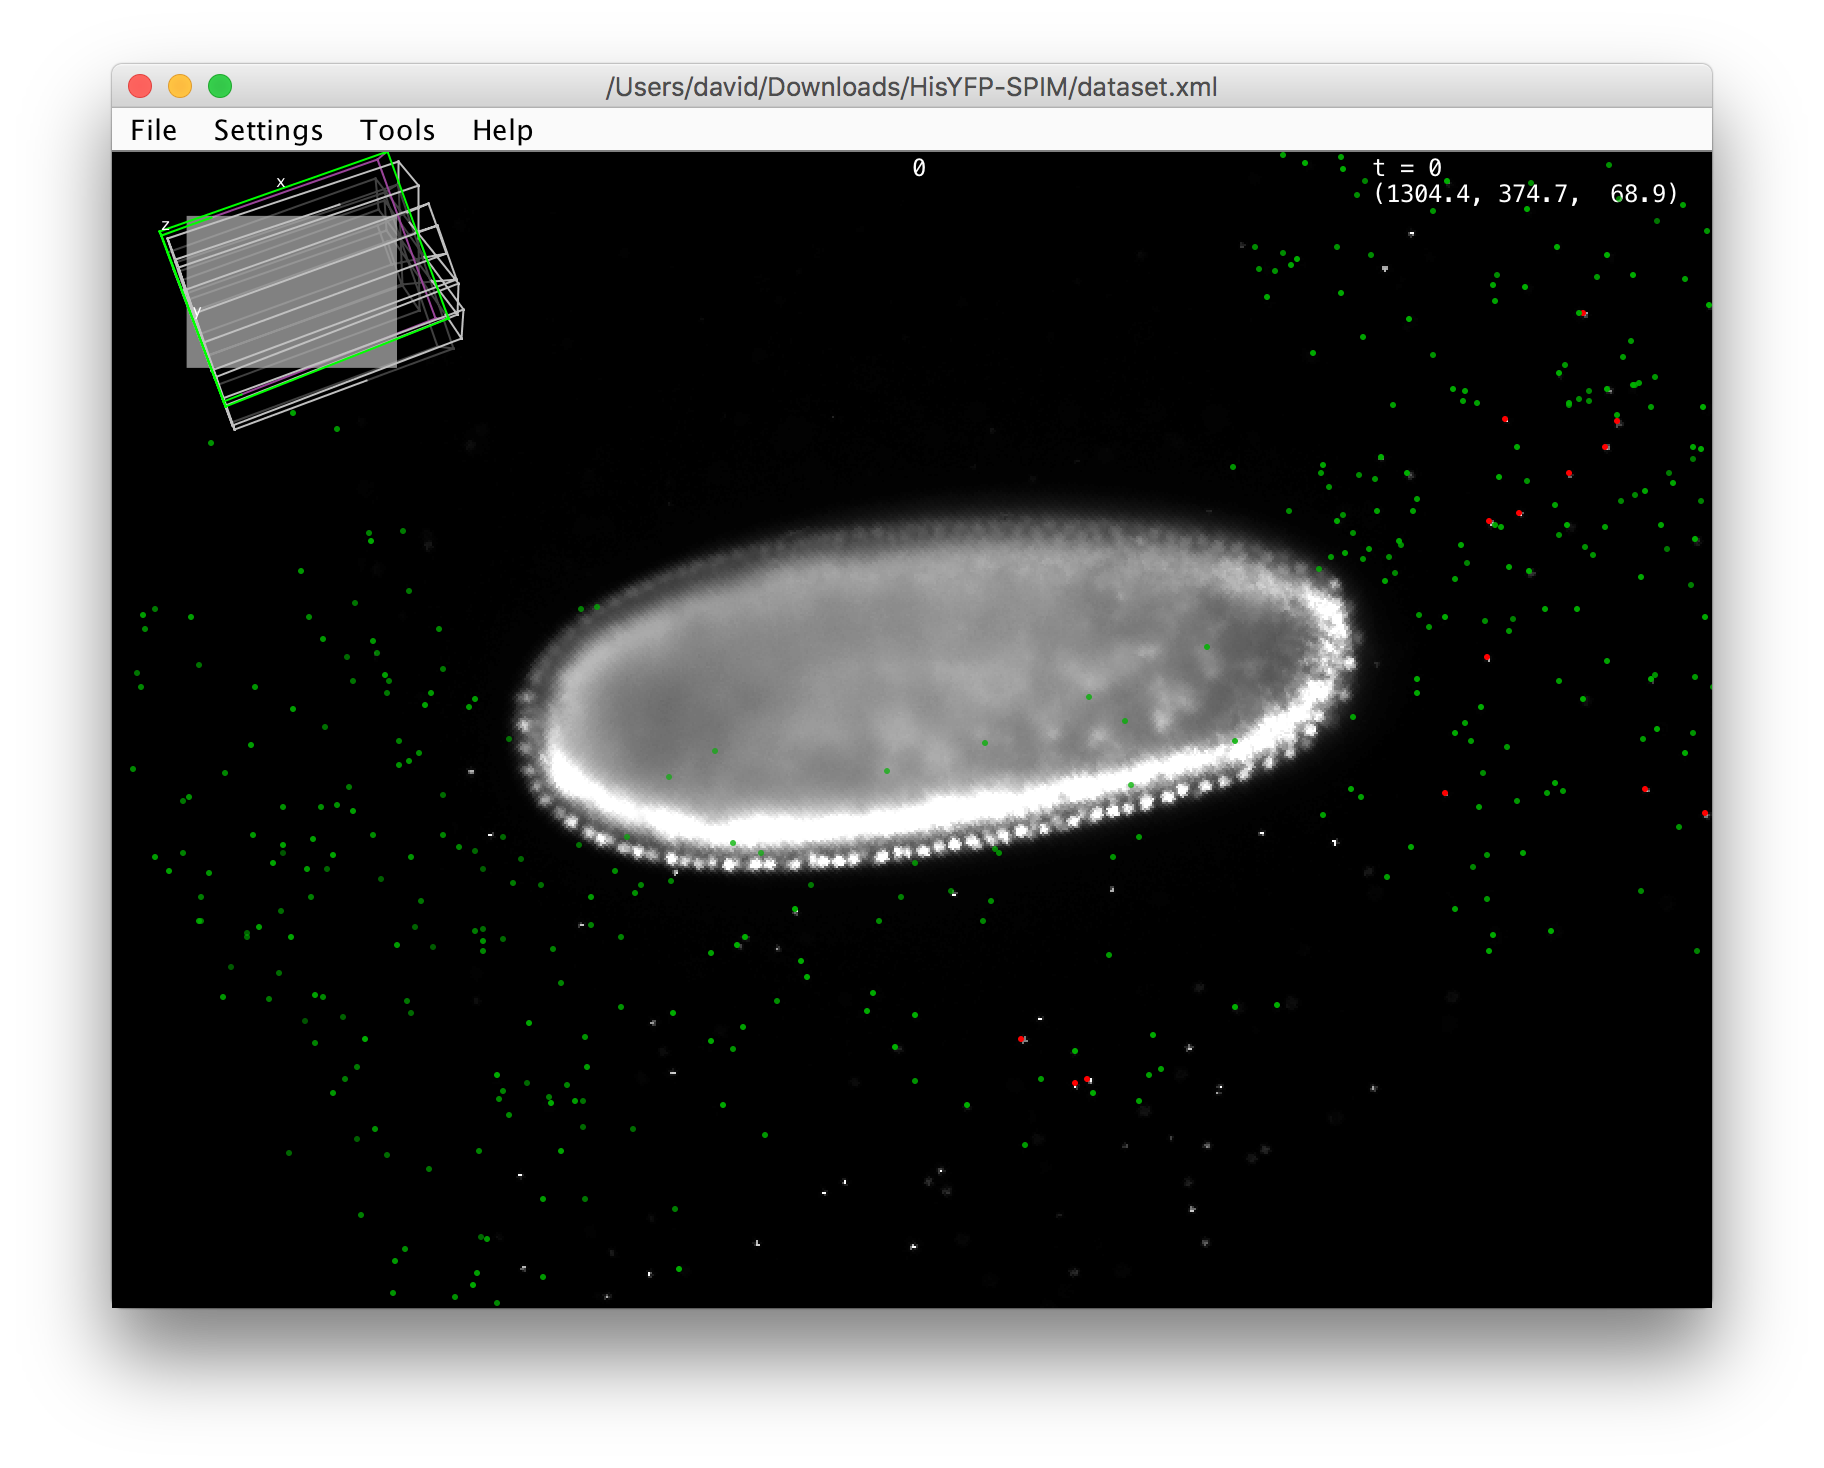
If the BigDataViewer is open, clicking on #Detections or #Corresponding will overly the detected or corresponding interest points in the BigDataViewer. All points will be displayed at once, with the points in the currently displayed image plane drawn in red and the points from other planes in green.
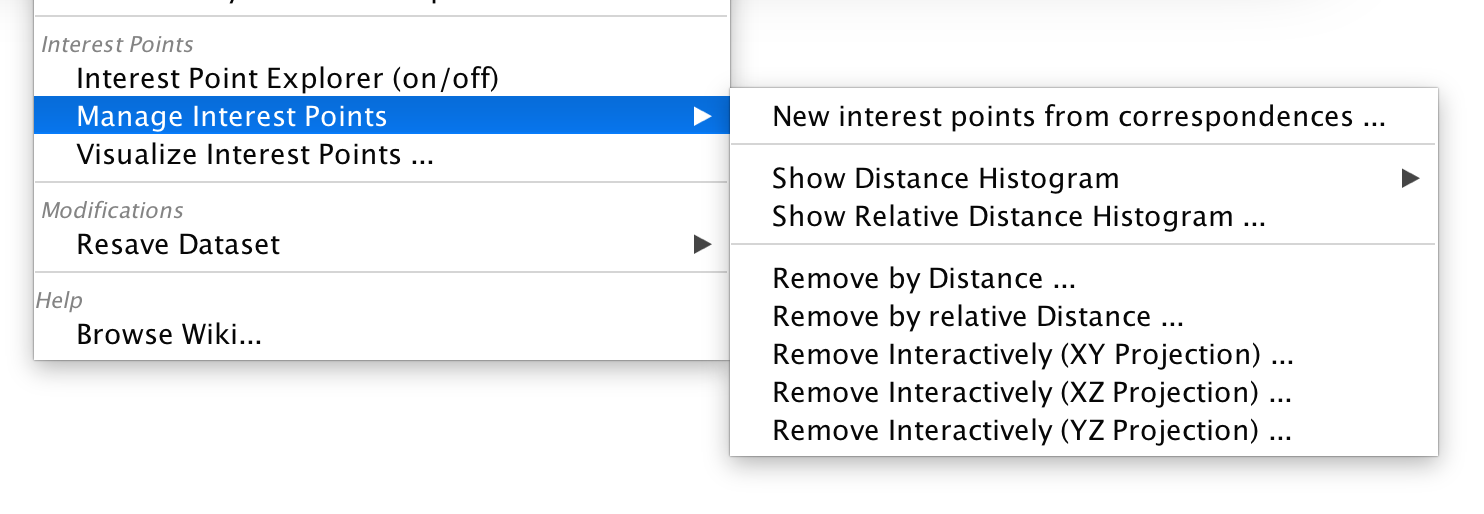
Manage Interest Points
In the Manage Interest Points sub-menu, we offer a few ways of filtering and managing interest points:
New interest points from correspondences
This allows you to select just the corresponding interest points with a given label and save them under a new name. Clicking this opens a dialog allowing you to select for which points to extract correspondences (Corresponding interest points) and give a name to the copied points (New label).

Show distance histogram
Selecting Show Distance Histogram … and clicking on an interest point label in the sub-menu will display the distribution of distances to the nearest neighbour for all interest points with the selected label in the selected views.
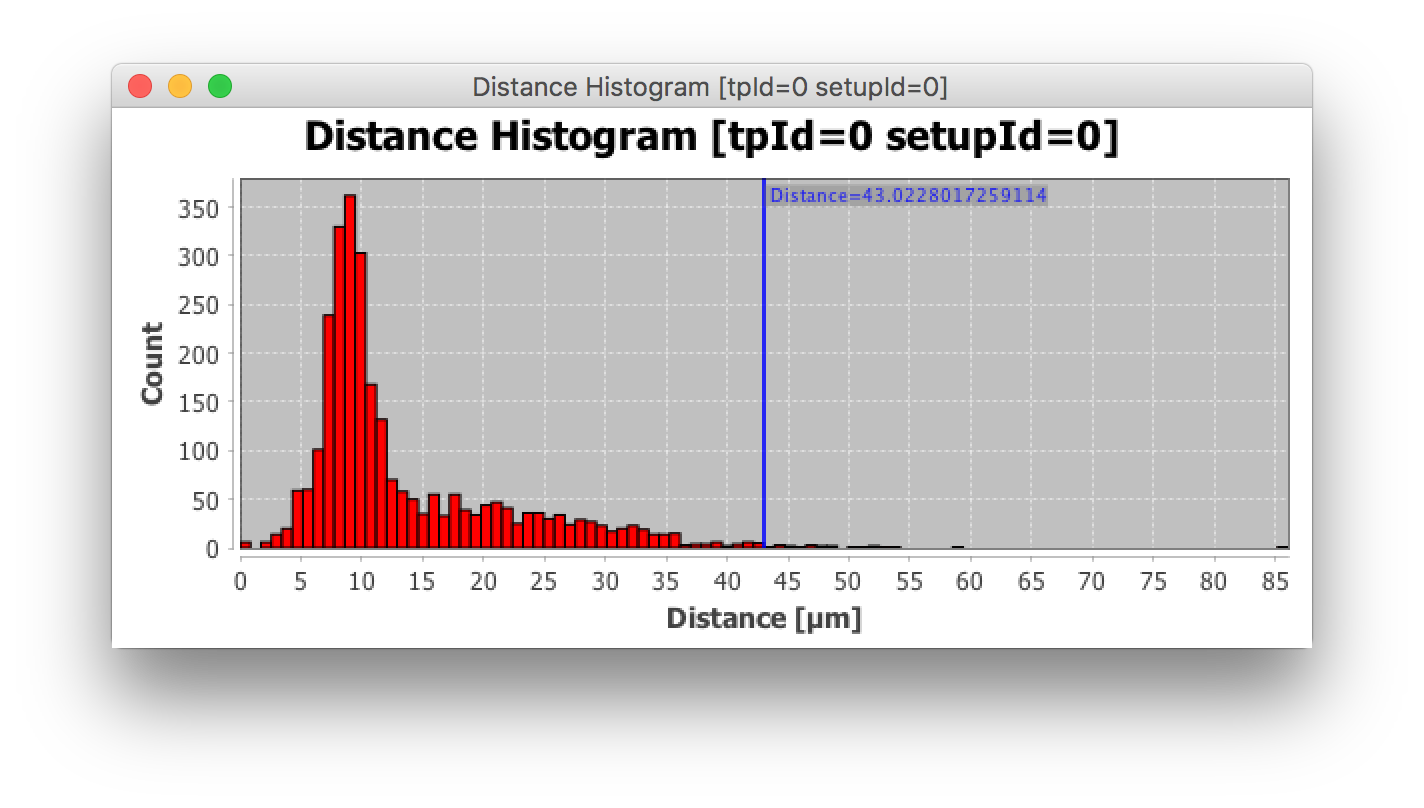
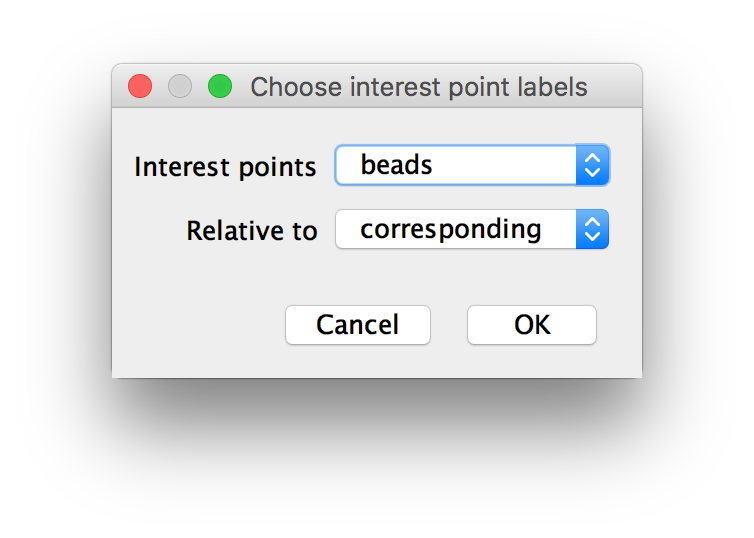
Show Relative Distance Histogram … allows you to plot the distribution of distances from points with one label to the nearest neighbor among points of another label. You will be asked for which Interest points to use and Relative to which other set distances should be computed.
Remove by distance
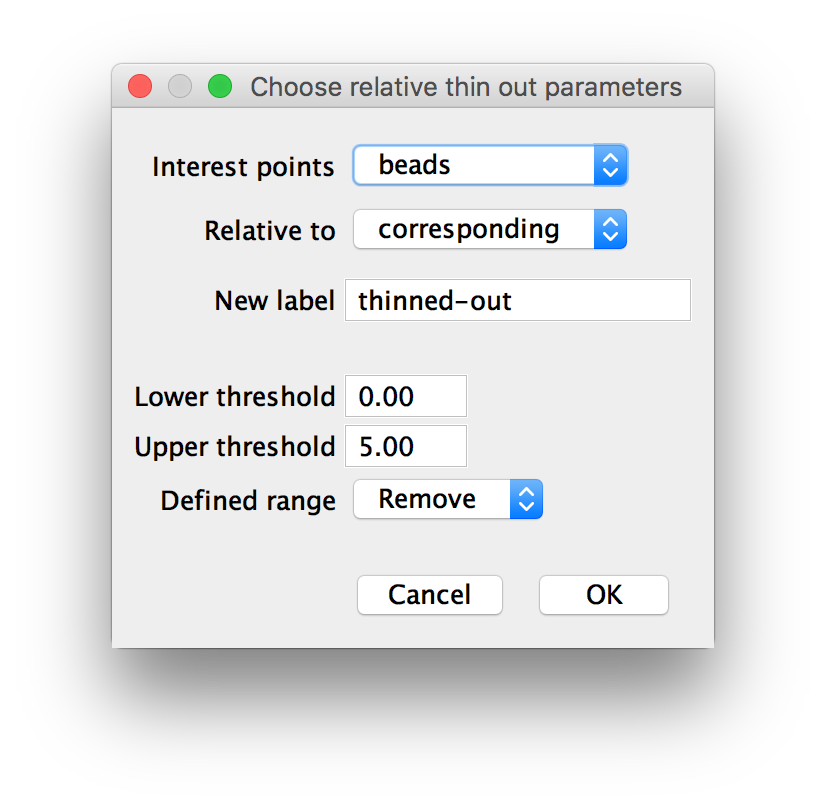
Using Remove by Distance or Remove by relative Distance, you can filter interest points by their distance to the nearest neighbor in the same point set or in another point set (relative distance). Clicking this opens a new dialog asking for:
- Interest points: the interest points to filter by (relative) distance
- (when using relative distances) Relative to: which other points to compute relative distances to.
- New label: under which name to save the new, thinned-out interest points
- Lower threshold and Upper threshold: the range of distances to keep or remove
- Defined range: whether to Remove points with a nearest-neighbor-distance in the given range or Keep them (removes all otside the range).
Remove interactively
Using Remove Interactively (XY-Projection)…, Remove Interactively (XZ-Projection)… or Remove Interactively (YZ-Projection)…, you can manually select areas in a projection of you images from which to remove or keep interest points.
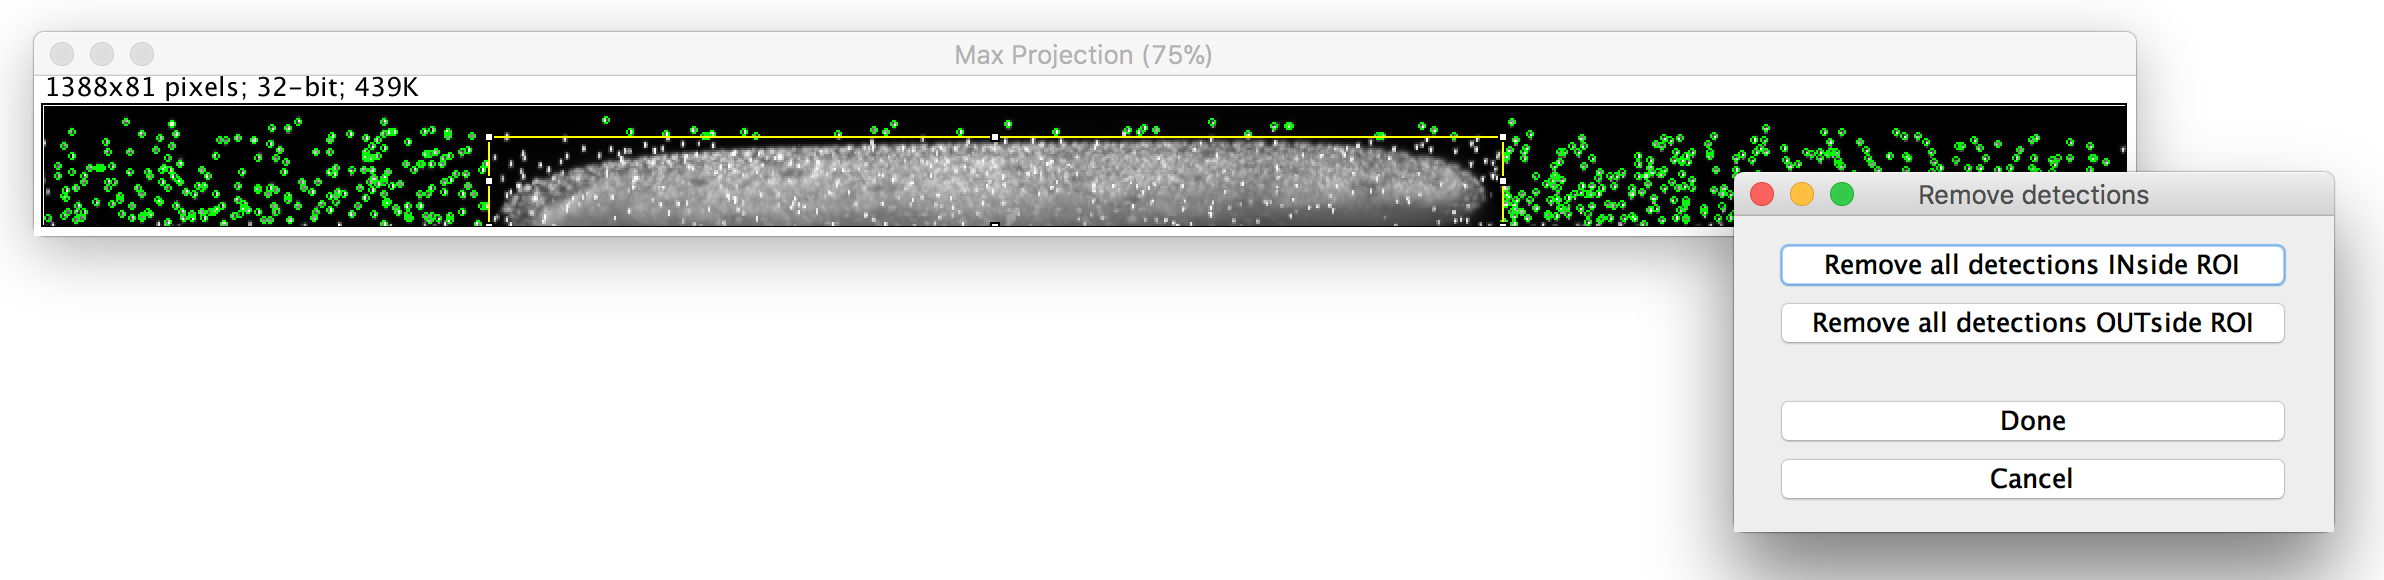
Clicking one of these will first ask for the name of the Interest Points to filter and a New Label to give to the result.
Clicking OK will open the selected projection in a new ImageJ window with the interest points highlighted in green. You can then select ROIs using the default tools of ImageJ and Remove all detections INside ROI or Remove all detections OUTside ROI in the new Remove detections-window. You can repeat the process if you want. When you are happy with the result, click Done to create the new, thinned-out interest points.
Visualize Interest Points
Finally, the Visualize Interest Points… menu item allows you to render interest points as Gaussian spots and display the result as a new image stack in ImageJ.
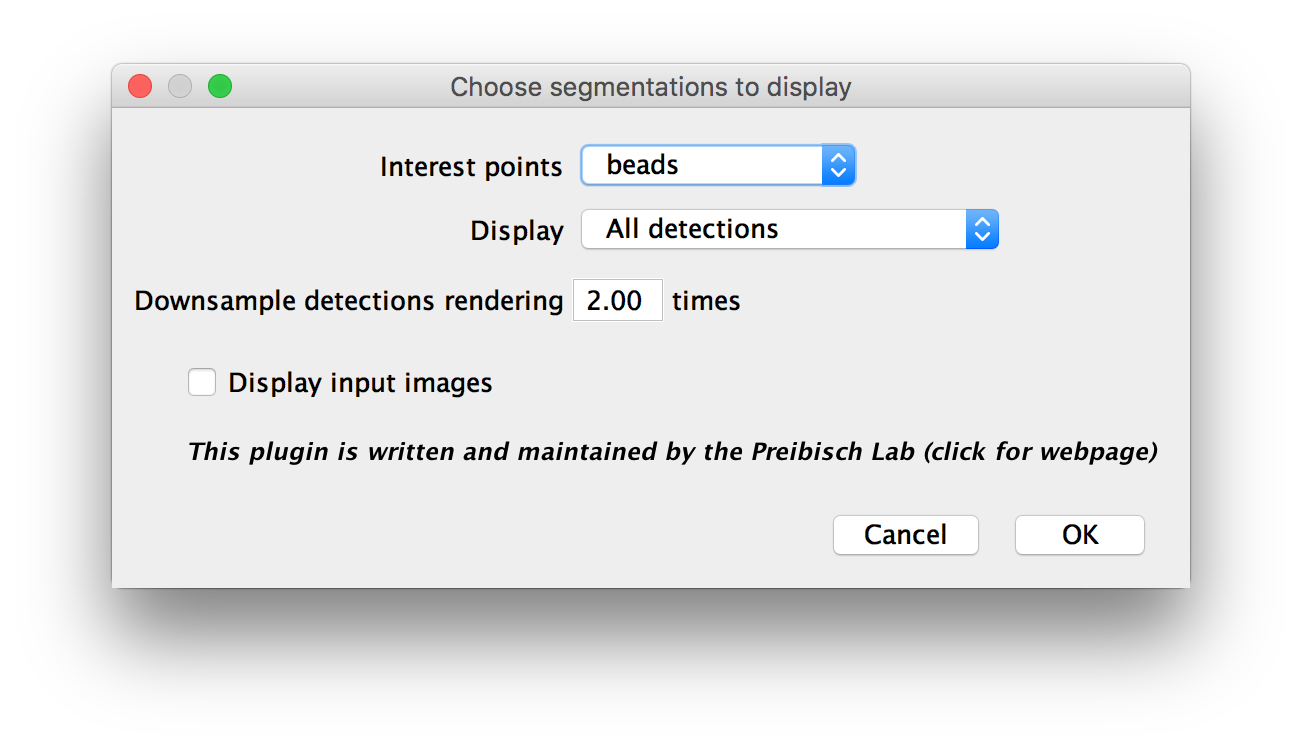
In the dialog, you can set the following parameters:
- Interest points: which interest points to visualize
- Display: whether to display All detections or only Corresponding detections (see above for details).
- Downsample detections rendering: by how much to downsample the resulting rendered stack (e.g. a full-resolution rendering will have the same size as the corresponding image stack).
- Display input images: click to also display the corresponding input images as ImageJ-images.
Clicking OK will produce an interest point rendering for each selected view.
Go back to the main page