Introduction
This tutorial explains how to set up a website to distribute your plugins. It assumes that your plugins are correctly installed in your local ImageJ2 setup.
Rationale
See the Distribution page for a discussion of the benefits of update sites and how they fit in to plugin development.
Creating a hosted update site
The easiest method to provide your macros, scripts and plugins to other users, letting them keep up-to-date in the most convenient manner, is to set up an update site on the sites.imagej.net server, hosted at LOCI.
There are some minimal Terms of Service for hosted update sites. See the Hosted Update Site Terms of Service for details.
Please use this thread on the Image.sc Forum to request new update sites and/or upload account.
You can also request:
- The addition or removal of uploader permissions for a given user to a particular site;
- A password reset for your upload account.
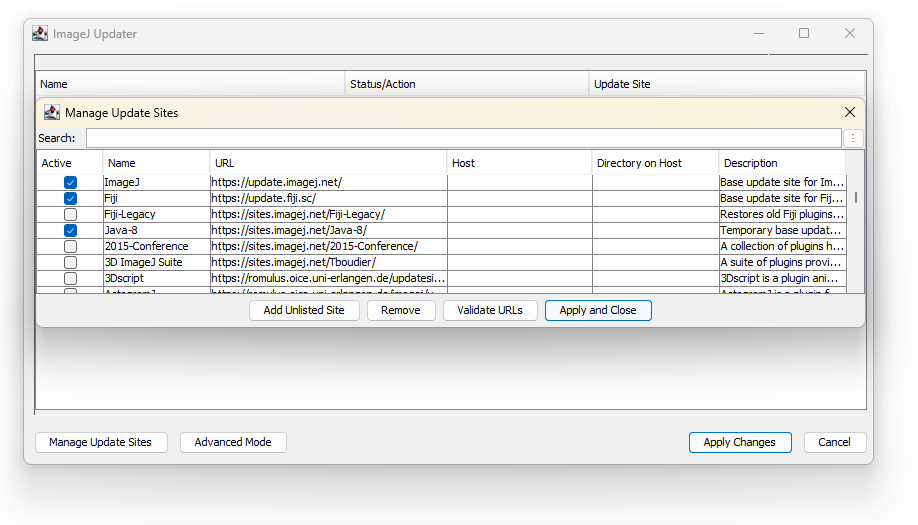
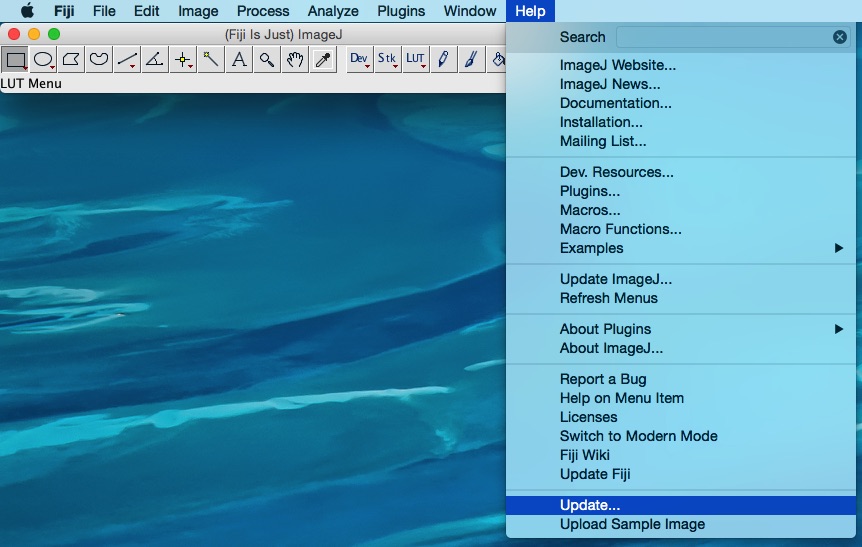
To start using your update site, in ImageJ2, start the Updater with Help › Update and click on the button:
Specifying your site
Click the button.
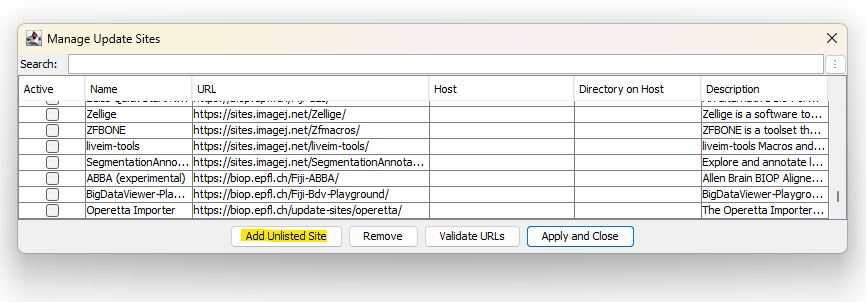
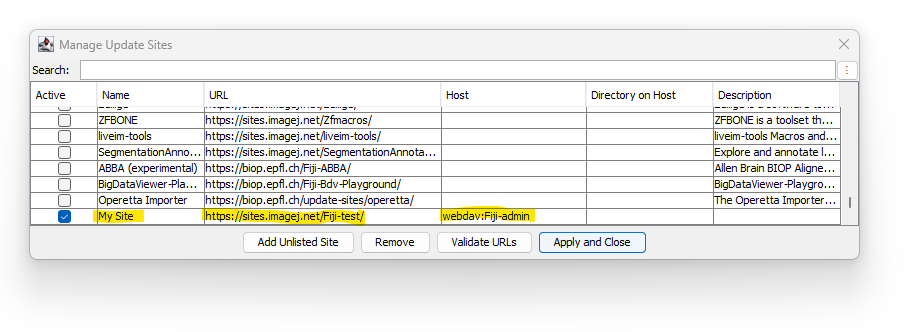
Using the URL and upload-username obtained above for hosted or self-owned sites, enter your site’s complete URL in the URL column and webdav:<upload-username> in the Host column. Optionally, you can edit the Name column for a local nickname to identify your site.
Dedicated plugin update sites
Rather than having a single update site for many plugins, it is highly advised to set up dedicated update sites for each plugin that could be of interest to the community.
Such dedicated update site can have a more intuitive name.
A given upload account can own several update sites. To request a new update site for your user account, post your request on the forum (see related post), or on the ImageJ Gitter.
Group update site
In addition to hosted update sites, it is possible for groups of people to share an update site.
To create such an update site, post on the Image.sc Forum, or in the imagej Gitter channel, requesting the creation of the site on sites.imagej.net, including the desired name of the site, as well as the upload users to be granted upload permission to the group update site. An administrator will then create the site skeleton and grant those users upload permission to the new site.
Adding an update site on your own server
If you have an own server or web space with WebDAV, SFTP or SSH access, you can create a directory in that web space and initialize it as an update site, too. Just call the updater with Help › Update and click the button:
Now press the button, provide a nick name for your update site, the URL of your web space, and upload information.
The upload information depends on the protocol available for uploading:
| Protocol | Host | Directory on Host |
|---|---|---|
| WebDAV | webdav:, or *webdav: |
. |
| SFTP | *sftp: |
* |
| SSH | *ssh: |
* |
In case you want to use an SFTP/SSH server, it must have an empty, public web accessible folder where you intend to publish your updates. The ImageJ updater will not create that empty folder.
A note about SSH and known_hosts: For ImageJ to connect to your server over SSH, you must have configured your SSH credentials as normal—i.e.: $HOME/.ssh/known_hosts must contain the host key, and optionally $HOME/.ssh/config may contain the host configuration/credentials. We recommend that the given host be specified in $HOME/.ssh/config and equipped with a private key.
Note that you need to connect with command-line ssh first, to record the finger-print of the host. It might be necessary to call ssh-keyscan test.imagej.net >> $HOME/.ssh/known_hosts to ensure the correctly formatted key appears in your configuration file. There is an issue with newer SSH servers offering host keys in ecdsa-sha2-nistp256 format, but the JSch library wanting them in ssh-rsa format instead. If you receive the error com.jcraft.jsch.JSchException: UnknownHostKey then you might be bitten by this discrepancy; try using the ssh-keyscan invocation above. If you still have trouble, please write to the Image.sc Forum to troubleshoot further.
Example: Let’s assume you have SFTP access to a machine known as imagej.example.org to the internet, and let’s assume that you have a user account myself that has write access to the path /var/www/my-update-site/ on that machine that is served via http://imagej.example.org/my-update-site/. Then the line you need to add might look like this:
| Name | URL | Host | Directory on Host |
|---|---|---|---|
| My Update Site | http://imagej.example.org/my-update-site/ | myself@imagej.example.org | /var/www/my-update-site/ |
If the update site has not been initialized yet (i.e. if nobody else has initialized that site yet), you will see a dialog like this:
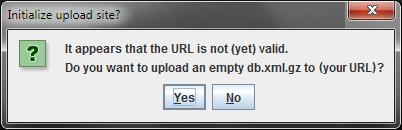
Just click OK and let the updater upload an empty file index (it is stored in the file db.xml.gz which is also called the database in the documentation of the updater).
Uploading files to your update site
Note: you cannot simply copy files to your web space; the updater would miss all kinds of important information, and consequently refuse to accept that update site. You need to let the updater handle the file uploading.
Start the updater and check your update site
First, start the updater:
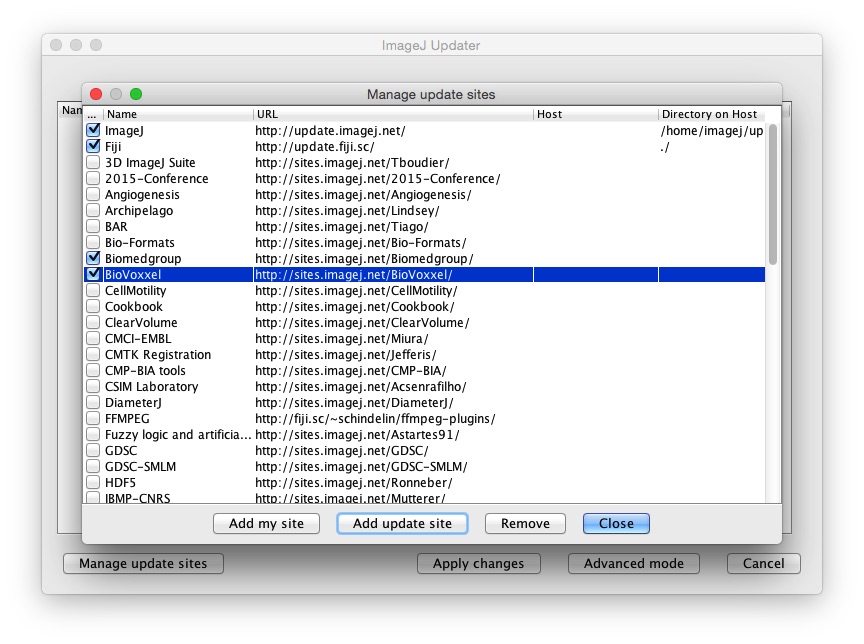
Click on the button and verify:
- Your update site is present and enabled
- The Host column of your update site contains your user name, in the form:
webdav:
For example:
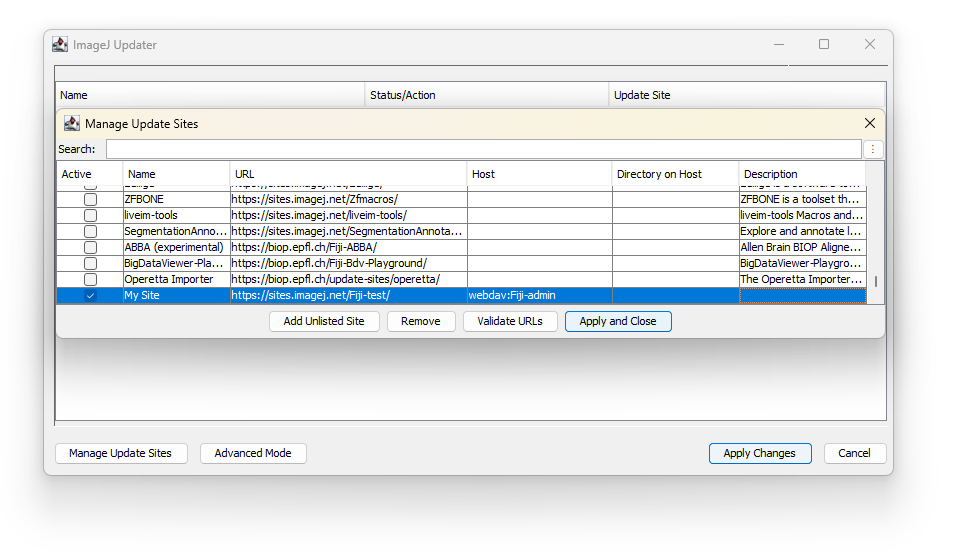
If this info is missing, see Specifying your site. Once your login information is set you can the Manage Update Sites window.
Prepare your files for upload
The general principle of populating an update site is to add the files of interest to your local Fiji installation, building your desired working state, then synchronizing to the remote update site.
Note that there are several guidelines for where these files should be placed, based on their file type:
- .jar libraries: for files used by other libraries or plugins, but not directly present e.g. in the
Pluginsmenu, they go in the jars folder (or subfolder). If the file is platform-specific, it goes in the corresponding platform subdirectory of the jars folder (e.g. jars/win64). - .jar plugins: new additions to the
Pluginsmenu belong in the plugins folder (or subfolder). Don’t forget to include an underscore (_) in the name! - .dll, .dylib, etc…: native libraries belong in a platform-specific subfolder of the lib directory (e.g. lib/win64).
- .ijm macros: the files should be in the plugins folder or an appropriately named subfolder thereof. Their parent folder will become the entry name in the
Pluginsmenu. - .py scripts: they can be either in the jars/Lib or scripts folder (or any subfolder).
If you are uploading platform-specific files you will also need to edit the metadata!
Out of those folders, the updater might not see them, or they may not be loaded correctly.
To see your plugin(s) or file(s) back in the updater, click the button and set the view options:
- If your have never uploaded your plugins, select View local-only files
- If you are uploading new versions of your plugins, select View locally modified files only
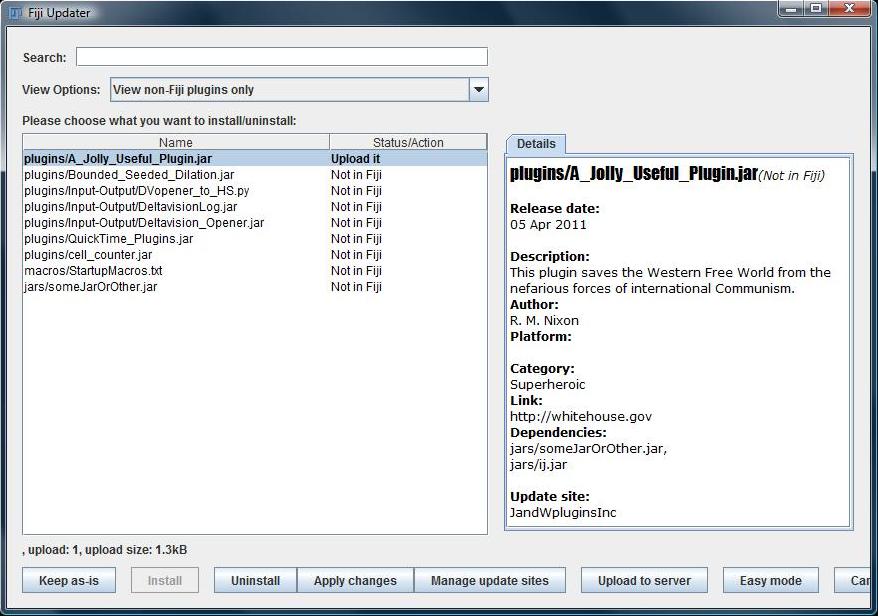
In this example, the plugin we’ll be uploading is contained in A_Jolly_Useful_Plugin.jar.
Select the file to upload, click under the Stats/Action column, or right-click (on macOS, ⌃ Ctrl +  Left Click) in any column, for the context menu and select Upload to <update site name>.
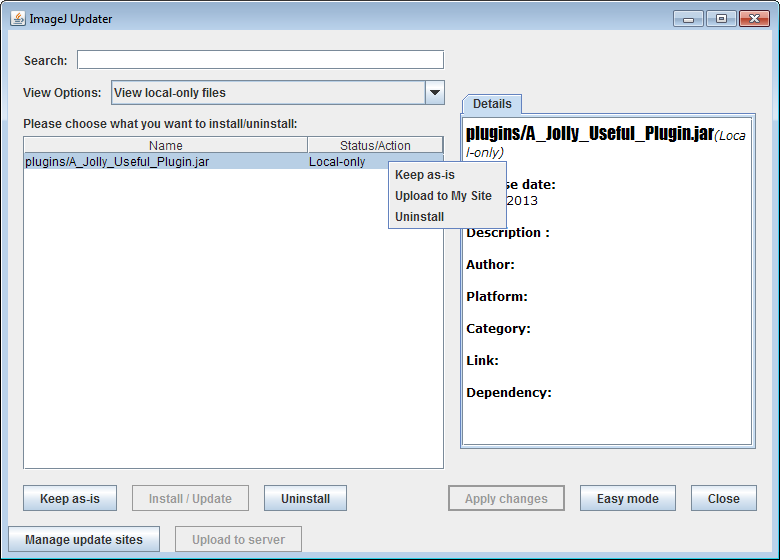
The Upload to <update site name> option is only available if you entered your upload credentials and no other changes are pending. This is to avoid potentially corrupting your ImageJ installation. If the Upload option is not available, select the View changes view and resolve any pending changes - e.g. by updating or reverting to Keep as-is.
Editing Metadata
When a file is selected in Advanced Mode, a Details panel becomes available. This allows manual editing of important metadata.
The Details panel can only be edited if you have entered upload credentials for the appropriate update site. After modifying the Details panel you can mark the jar for upload, even though the jar contents itself has not changed.
Platform-specific Files
Some files in your update site may only be appropriate for specific platforms (e.g. Mac, Windows, Linux): dll or dylib files, for example. In that case, the Platform field can be used as a “classifier,” such that the updater will only download the given file if its platform value matches the current platform ImageJ is running on. This allows you to upload platform-specific binaries for all platforms to a single update site.
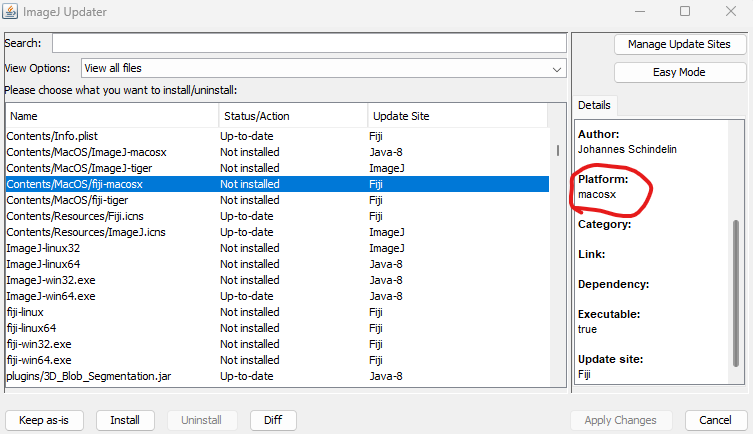
Note that this field must have one of the following values:
- macosx
- win32
- win64
- linux32
- linux64
Platform values other than those in this list will cause your file to never be matched, so it will not show up for any follower of your update site.
Modifying Dependencies
The plugin’s dependencies, e.g. ij.jar and someJarOrOther.jar, are automatically determined by the updater. Hence if you require 3rd party packages for your plugin you can place them into the jars folder of ImageJ and the updater will automatically upload them to the site.
Sometimes the updater will mis-detect your dependencies. This may prevent you from uploading to your update site! If a dependency is wrong, you can manually add or delete dependencies from the Details tab to correct the problem. Please let us know when this happens so we can try to improve the updater
Upload your files
Finally, click Apply Changes (upload) to upload your plugin to the server and allow others to access it. If you have dependencies that are not part of ImageJ, the updater will ask you if you want to upload that jar as well. Finally, you will be asked for your login credentials again and the files will be uploaded to the server.
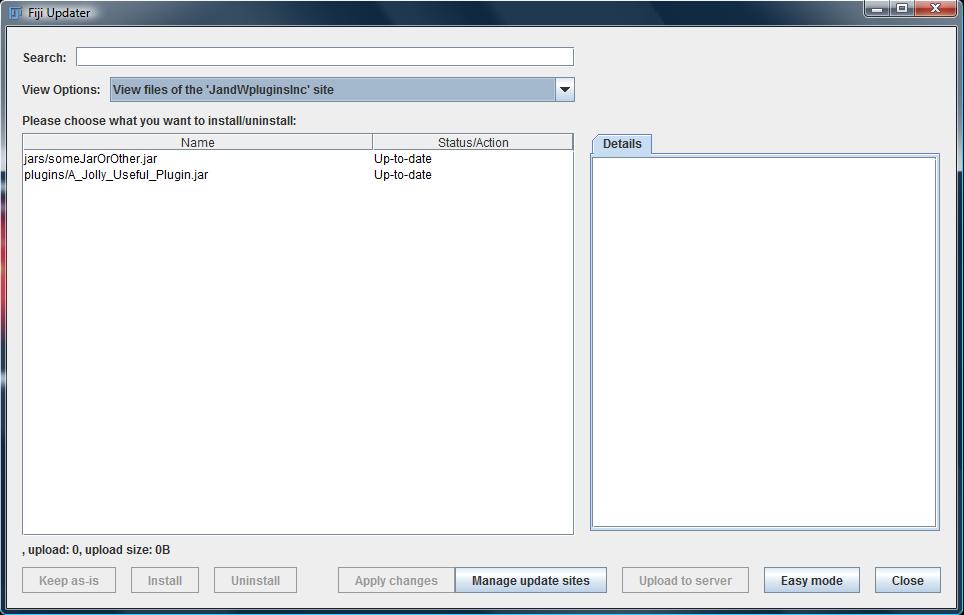
Check that your plugins are now registered as ImageJ plugins by selecting the View files of the ‘[your site name here]’ site view option:
That’s it - you’re done. Now, anyone who wants a copy of your plugins merely needs to add your update site to the Update manger via the URL you specified, and your plugins will be downloaded and updated in their ImageJ installations just like the standard ImageJ plugins.
For even more visibility and practicability, you can ask to have your update site listed in the Fiji Updater (see section below).
Removing files from your update site
Sometimes you may have libraries or resources that are no longer necessary for your update site. Follow these steps to remove unwanted files.
Uninstall (local)
An ImageJ update site is essentially just a record of the changes/modifications from a base ImageJ distribution. We always populate an update site from our local installation, and for removal that’s no different. The first step is just physically removing the unwanted file(s).
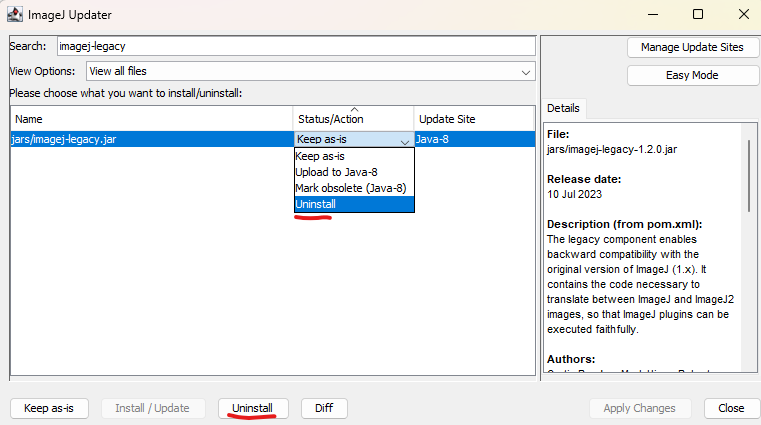
In the view of the updater, you can select any installed file and use either the button, or drop-down menu entry, to mark an item for removal. Then when you , the selected item(s) will be deleted from your local filesystem.
This is functionally equivalent to removing these files manually from your filesystem; feel free to do so before starting your ImageJ application.
Mark obsolete (update site)
Once you have removed the undesired files, go back to the view of the updater and find the removed file(s). Using the View uninstalled files only view option can help here - if your file is not showing up on this view then something is off: double-check the file is not present locally.
When you find the uninstalled file(s) you can click their Status/Action and change it to Mark obsolete (xxxxx). This option should always have an associated update site name; verify that it matches the update site you will be removing the file from.

Marking a file as obsolete will change its status to Remove it, and the action button to
Upload the changes
Now you can proceed with uploading, just as you did when adding new files.
This will make a record of the removal in the update site’s metadata, so you can always verify what happened in the future.
Publishing your update site
If you want your update site to be listed in the ImageJ update manager, follow the instructions at this page : list of update sites .
Further Reading
For additional information on common topics regarding update site maintenance, please see the update site FAQ.
Troubleshooting
If you run into any problems, please let us know!