The content of this page has not been vetted since shifting away from MediaWiki. If you’d like to help, check out the how to help guide!
See also: the dataset definition documentation in Multiview-Reconstruction.
The Manual Loader (Bioformats) and Manual Loader (TIFF Only, ImageJ Opener) provide a robust way of importing datasets into BigStitcher. They allow you to manually specify the contents of a set of files and combine them into a dataset.
Step 1: Defining what to look for
In the first dialog, you can specify which attributes (time points, channels, illumination direction, acquisition angle, tile) the single image stacks in your dataset have. For each attribute, you have to select if you have multiple instances or not.
When using the Manual Loader (Bioformats), we also support one file to contain multiple instances (e.g. all channels in one file)
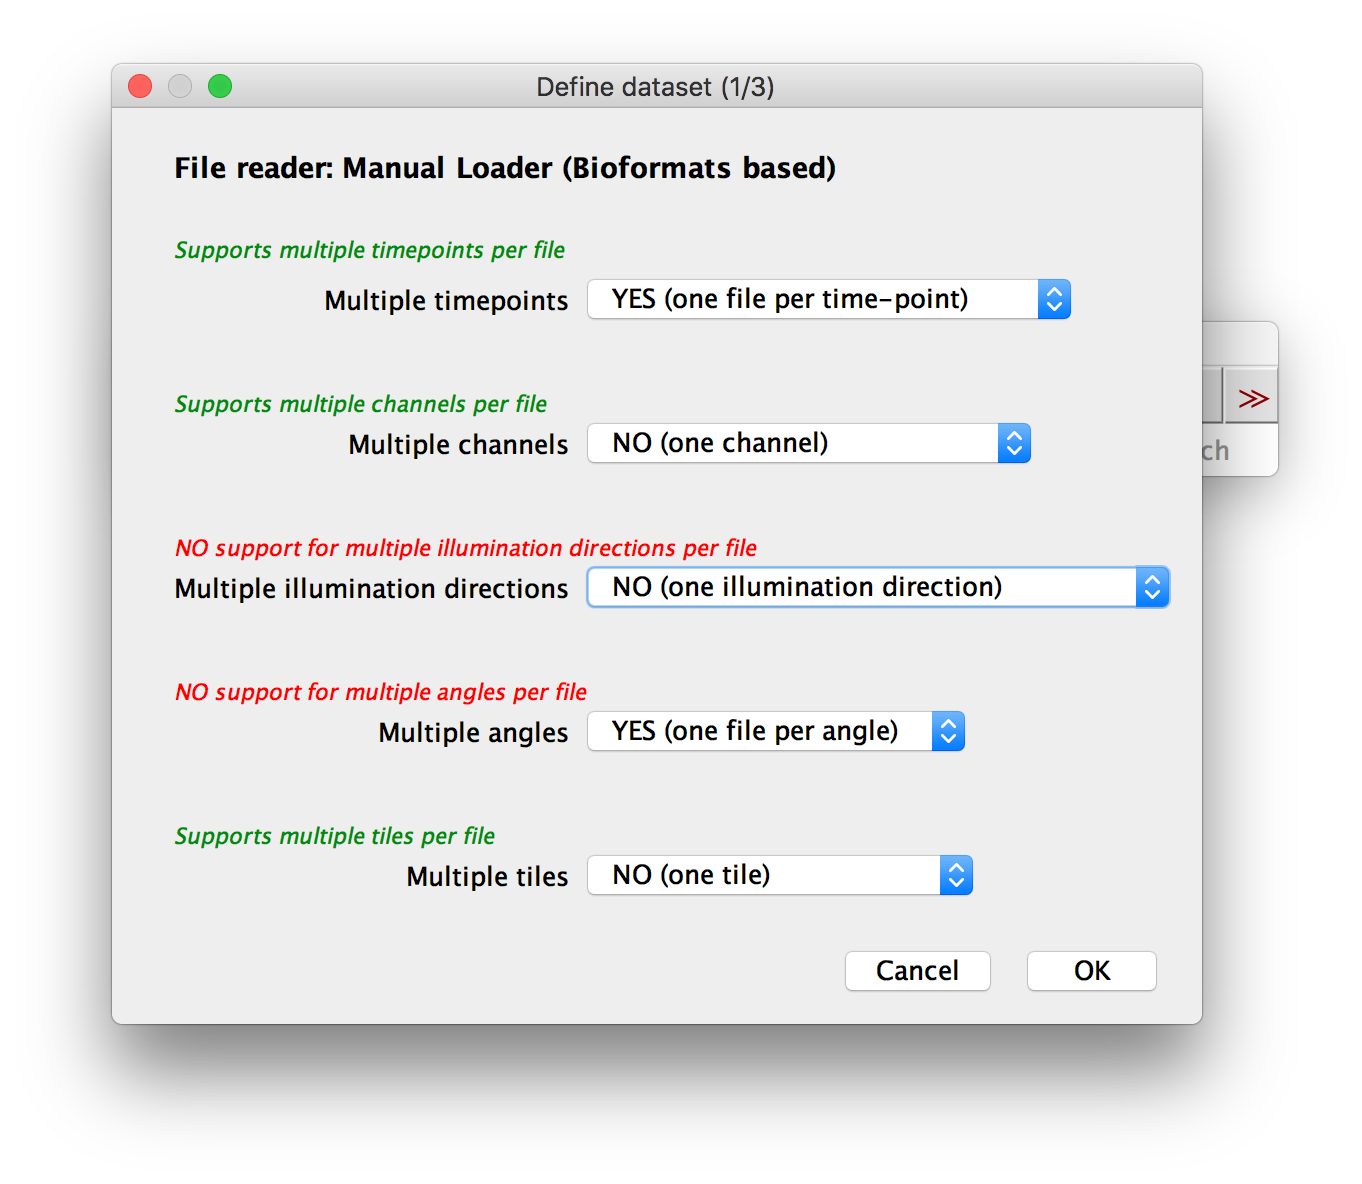 Step 1: Defining attributes of data in Manual loader.
Step 2: File pattern and additional options
File pattern
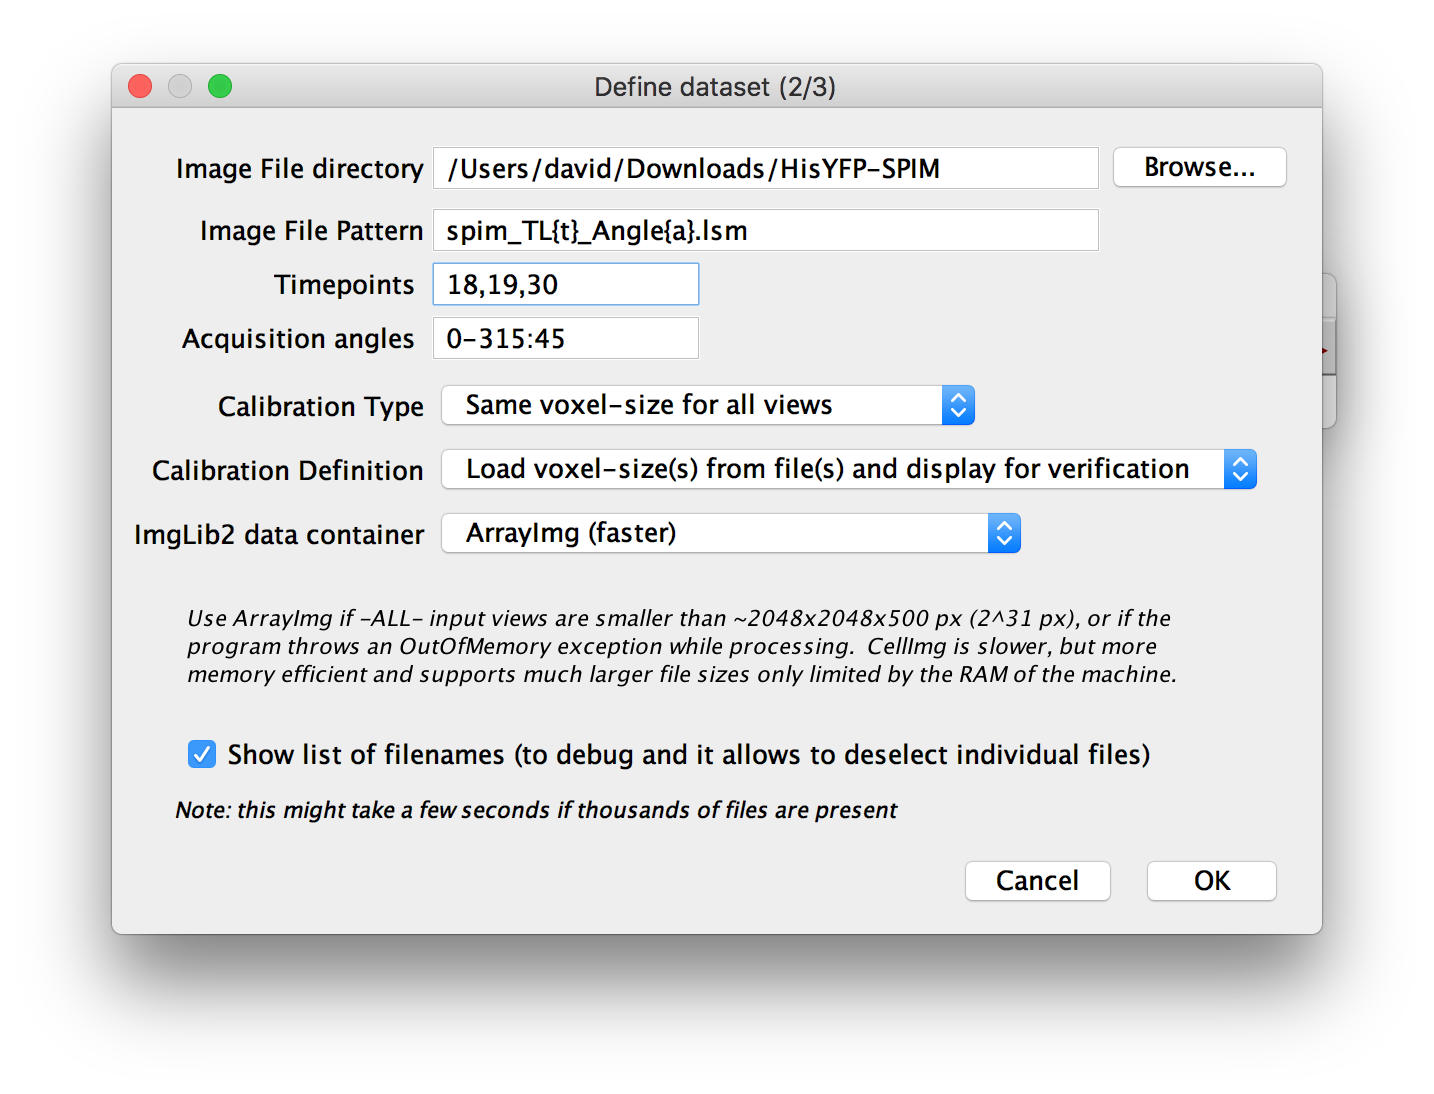 Step 2: Defining file pattern and additional options.
In the next dialog, you will be asked to specify the Image File directory, i.e. the directory that contain all the files to include in the dataset.
You will also be asked for an Image File Pattern with placeholders for the actual attribute indices. For all attributes for which you specified YES (one file per … ) in the previous dialog, you have to include a placeholder in curly brackets:
{t}for time points{c}for channels{i}for illumination directions{a}for angles{x}for tiles
If your attribute indices always have a defined length in the filename , e.g. angles 000, 090, 180, ..., you can specify that length by repeating the placeholder e.g. {aaa} for 3-digit angle index.
Next, you have to specify the actual indices for all the attributes. You can do this in two ways:
- just list them, separated by commas. e.g.:
18,19,30 - specify a range in the form:
start-end[:step]. e.g.0-315:45will produce0, 45, 90, 135, 180, 225, 270, 315
For attributes for which you selected YES (all … in one file), please set the range to 0-(number of instances - 1), e.g. 0-2 for 3 channels.
other options
Furthermore, you can specify the Calibration Type i.e. whether the voxel size is the same for all views or different for each one.
Then, you can specify the method of ’ Calibration Definition’, i.e. whether to load voxel sizes from file metadata, manually define them or load from files and display for manual verification.
You can choose which ImgLib2 data container to use. This is explained in detail in the dialog, but as a rule of thumb, use ArrayImg if all single images in the dataset are smaller than ~ 2 gigavoxels (width * height * depth) and CellImg if any one of them is bigger.
verification of files
Finally, you can choose to Show list of filenames. If you select this and press OK, we will list all the files you specified via the pattern in a new dialog (indicating whether they actually exist or not) and allow you to manually deselect some of them. Deselecting a file will mark the corresponding view in the dataset as missing. You can use this to ignore specific parts of the data, e.g. time points at which the sample moved, etc.
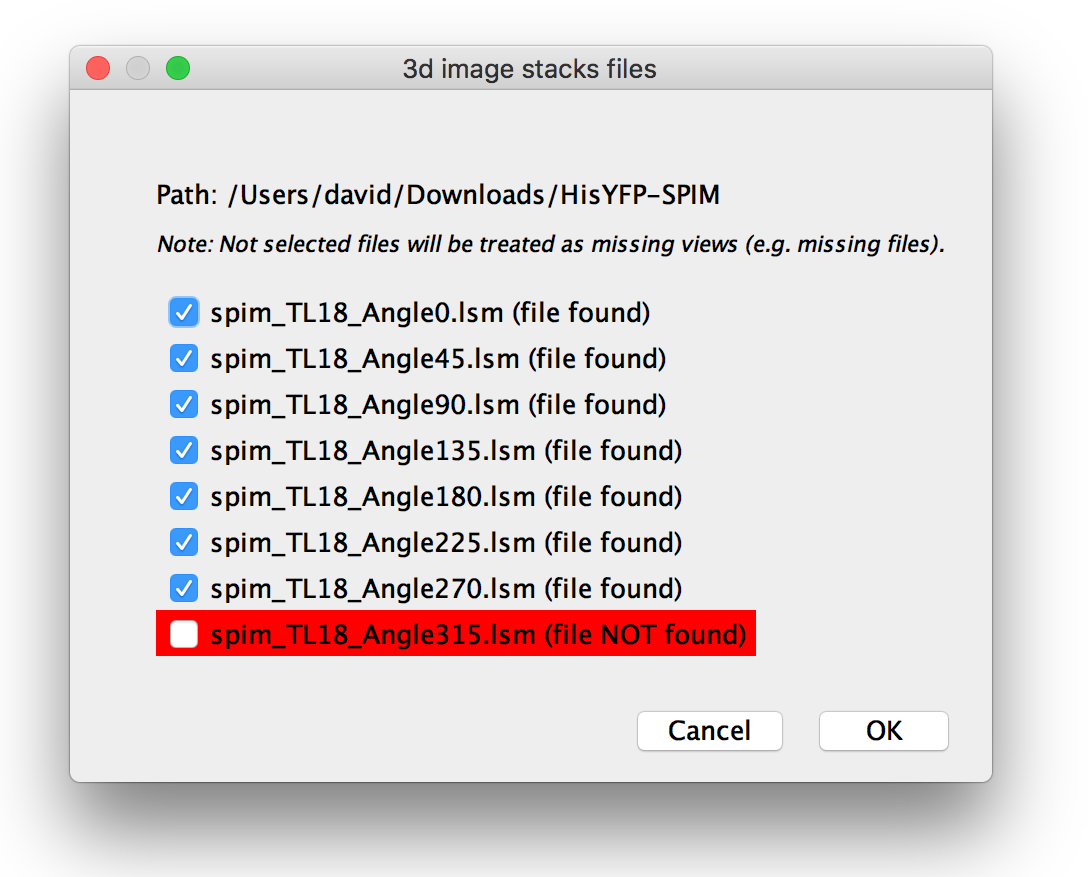 Verification of files in dataset.
Step 3: Verify calibration
If you chose to manually specify the voxel sizes or load them from metadata and display for verification, you can modify them in the next dialog. If you opted to use a different voxel size for each view, you can set the pixel distances and units for each view in this dialog, otherwise, one calibration will be used for all.
 Step 3: Verifying/modifying calibration.
Once you click OK, your dataset should be displayed in the BigStitcher main window.
Go back to the dataset definition overview
Go back to the main page