Since version 8, TrackMate ships a new feature that allows editing object shape in 2D. The spot editor is based on Labkit components, and is made to simplify and accelerate the creation of tracking ground truth. In this page we explain how to use it to modify segmentation results directly in TrackMate.
The editor
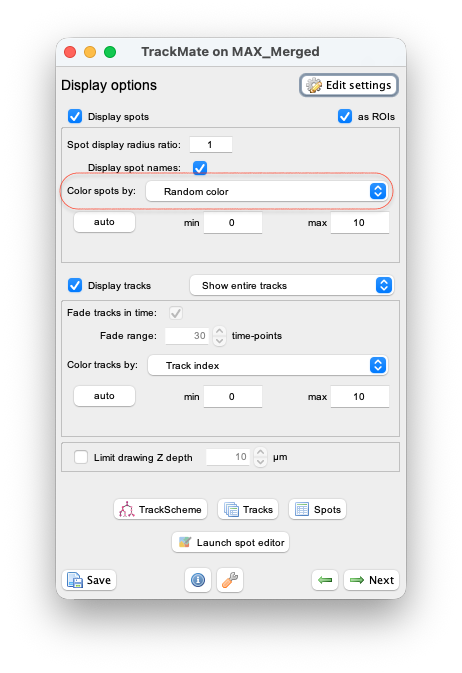
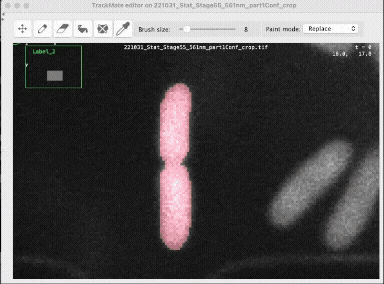
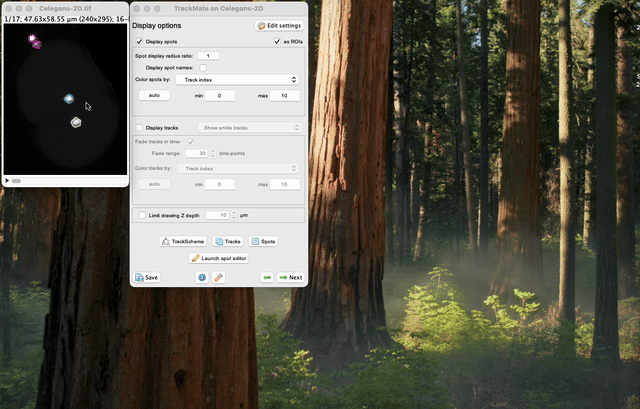
The spot editor can be launched from the Display options panel of TrackMate:
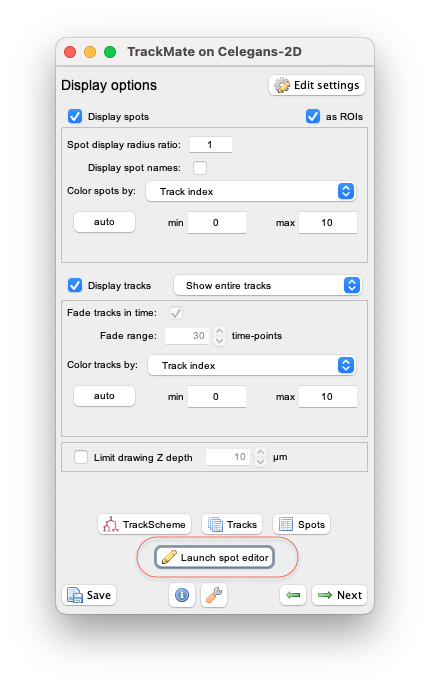
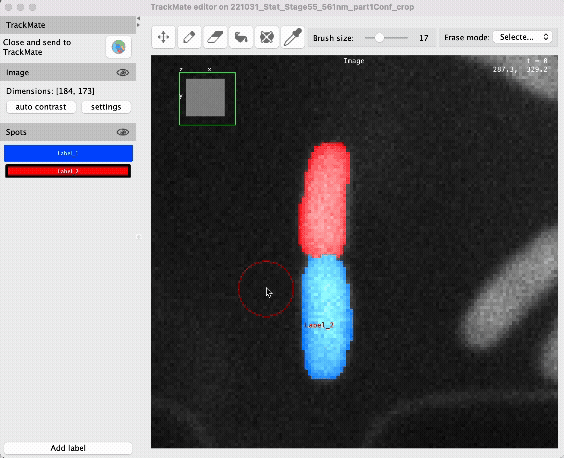
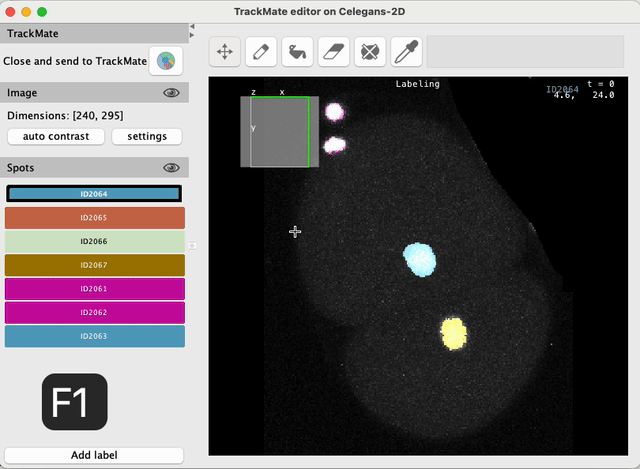
This button is visible only for 2D images. When clicking on this button, the user interface of TrackMate is frozen and a new window appear:
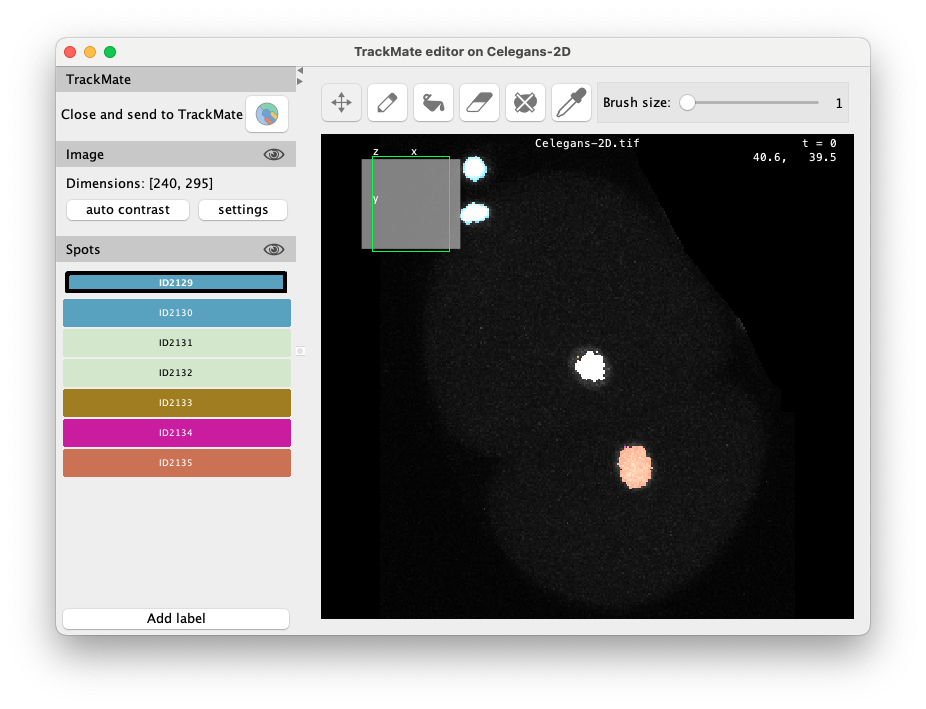
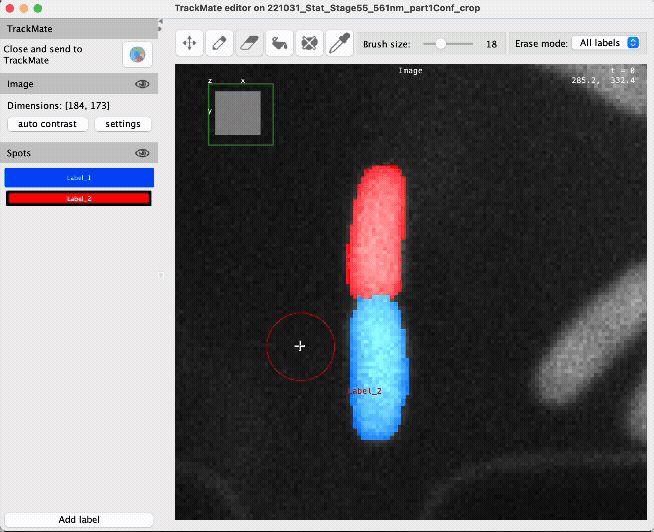
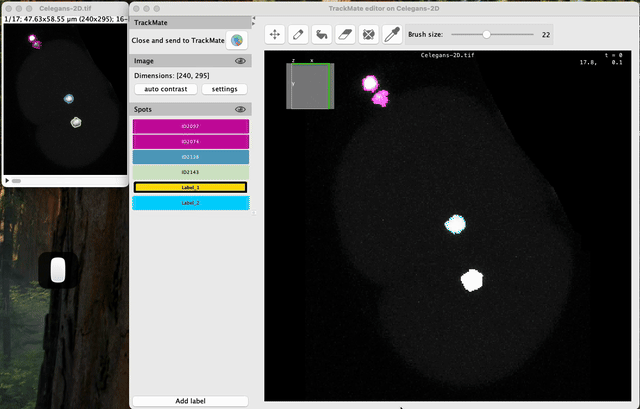
The editor is made of several UI components:
- The main editor panel, where the image is painted along with the spot masks (center).
- The side panel (left) that contains from top to bottom:
- the ‘Close and sen’ button, that finishes editing and returns to TrackMate;
- the image visibility tool (with the eye button), that let you hide / unhide the image, perform auto contrast, and open the display settings panel (will appear on the right);
- the spot label list, listing all spots currently in the editor, and a global visibility button (the eye).
- The toolbar (top).
The toolbar shows the six editing tool we use to annotate an image:
Navigating in the editor
The editor window is actually a BDV component. If you know your way around BDV you will get your bearings quickly. Otherwise, here is how to navigate in the image panel.
Panning, rotating and zooming
- Pan the image with the
 Right Click button.
 - Rotate the image with the
 Left Click.
 - Zoom in and out towards the center of the panel with the
 Mouse Wheel.
Resetting the view
- ⇧ Shift + Z aligns the view with the XY plane.
- ⇧ Shift + R resets the view.
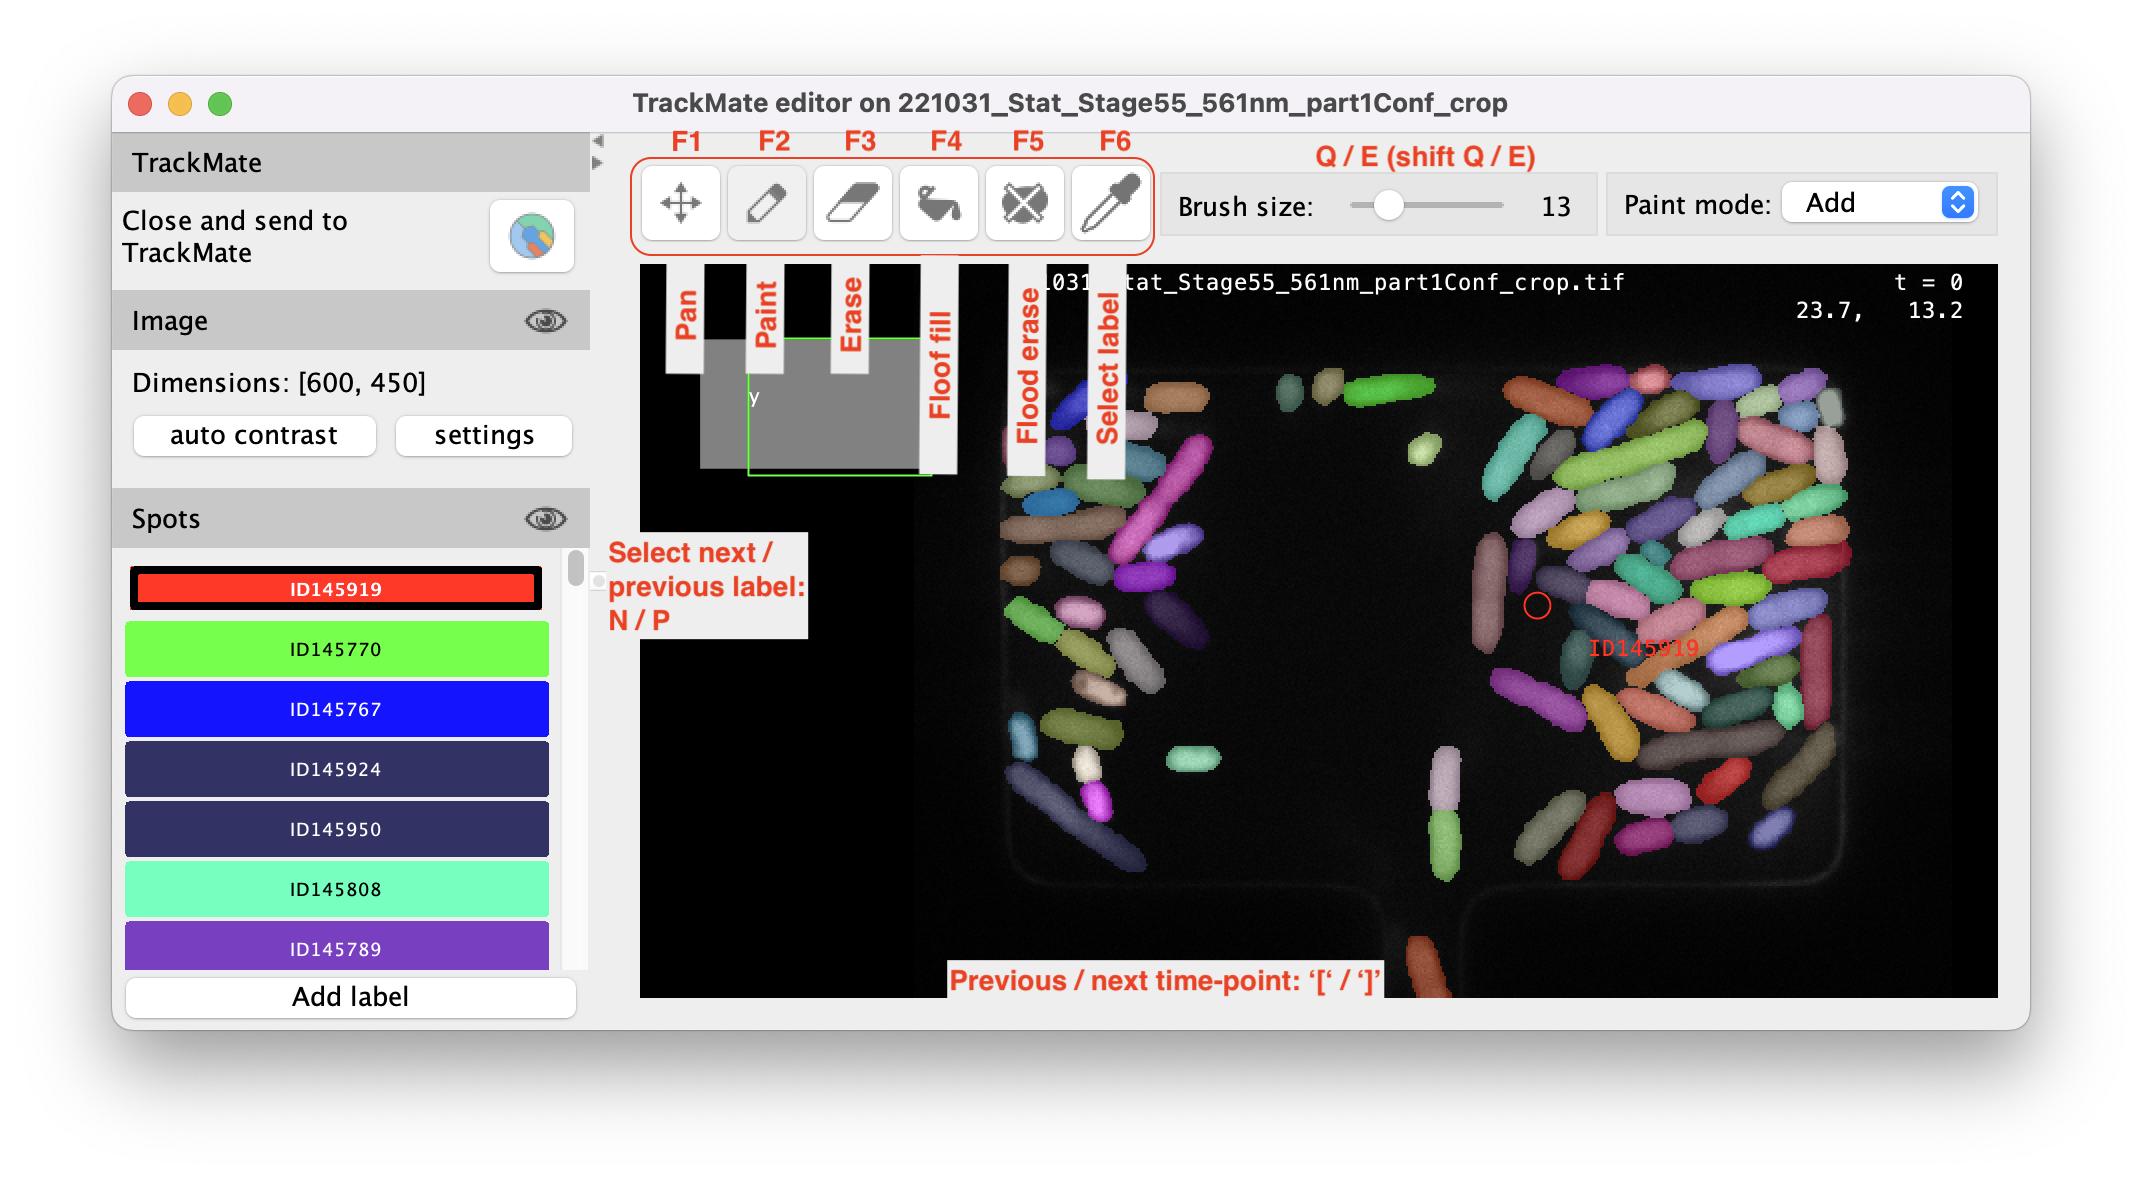
Navigating to spots
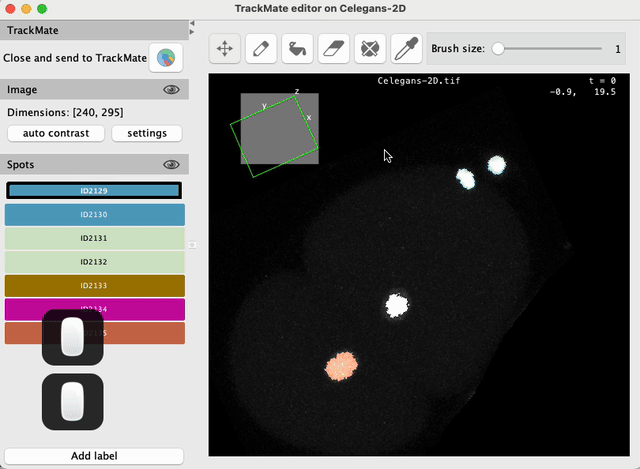
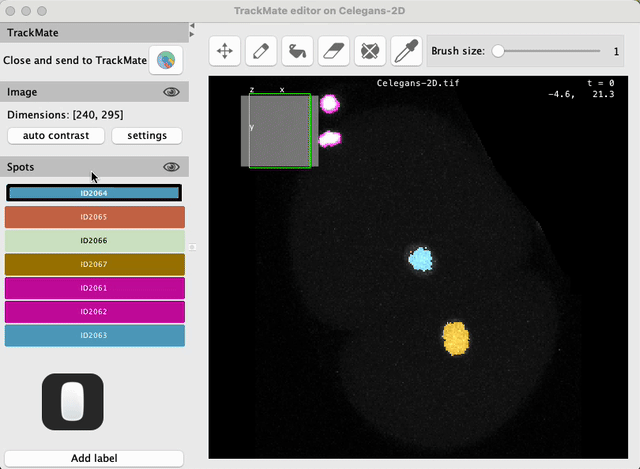
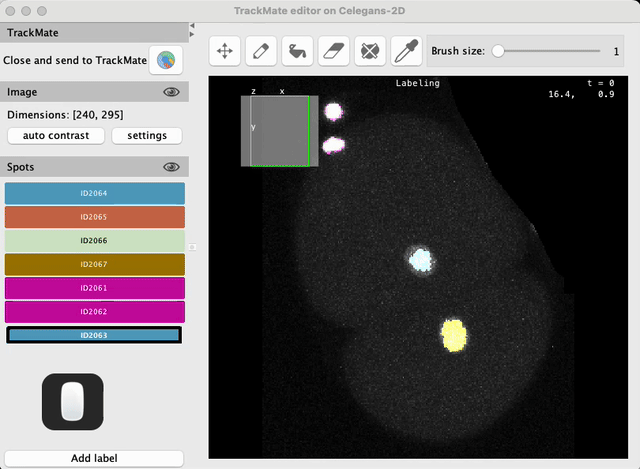
On the left side bar, you can see the list of labels currently in the editor. Each label initially corresponds to a spot in TrackMate. The label will have the same name and color that of the current view in TrackMate. Shift-clicking on a label in the list will center the image view on the corresponding spot mask
Changing the display settings
The Image section in the left side bar allows you to change the display settings of the image. The auto contrast button will set the display range to the min and max pixel values in the image. The settings button will open a dialog to change the display settings of the image, such as the color table, the brightness and contrast and the visibility of channels and spots.
Editing spots
Editing spots is made by painting labels in the editor. When you modify a label, the modifications will be reimported into TrackMate when you close the editor. In TrackMate, 2D spots are polygons, but we found out that painting inside the input image then converting to spots was fast and convenient, particularly with a tablet.
For editing, TrackMate spots are written into labels
The editor will display the spots as a ‘labeling’, a colored image where the pixels inside each spot is painted with a specific label. All the labels corresponding to the spots in the image are listed on the left side bar. The are created with the same color and name that of the spot they correspond to.
So it is possible that two different spots will lead to two different labels in the editor, but with the same color, which will make them indisinguishable. If this is the case we recommend changing the spot coloring before launching the editor. For instance, selecting the Random color mode.
Modifying a spot is adding a removing pixels from its shape. There is a gotcha however: When you finish editing the actual label of a spot does not matter anymore. For instance, if you paint a new spot with an existing label, so that the new spot is disconnected from the initial spot or even on another time-point, the new spot will be created as a separated one in TrackMate. The fact that the initial spot and the new one have the same label plays no role if they are not touching.
The six editing tools
When you select one of the tool by cliking on its icon or with F1 - F6, the right part of the toolbar changes to show the tool controls.
The pan / move tool - F1
See above. When this tool is selected, the mouse is used to navigate in the image.
Painting labels - F2
When the paint tool is selected, left clicking in the image will paint the label currently selected in the image, as if you had a brush. You can select a label in the side bar, or create a new label to create a new spot. The select label tool described below is used to select a label at a given pixel.
You can change the diameter of the brush with the slider that appears right of the toolbar. The default key shortcuts to do so are Q / E and ⇧ Shift + Q / ⇧ Shift + E
The rightmost list allows changing the paint mode. There are three of them: Replace, Add, Preserve. The selected modes and brush size are remembered between use of the editor.
Paint replace
This is the default mode. If you paint over an existing label, it is discarded.
Paint add
In TrackMate the spots can be overlapping, and as a consequence, in the editor you can have several labels on one pixel. This is the way to edit overlapping spots. The Add mode paint labels, and if there is an existing label, it will add the selected one, and not remove the existing one:
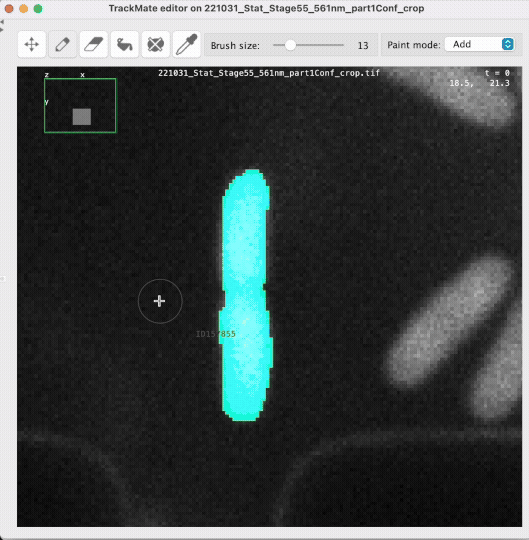
This will lead to overlapping spots, as demonstrated in the animation above.
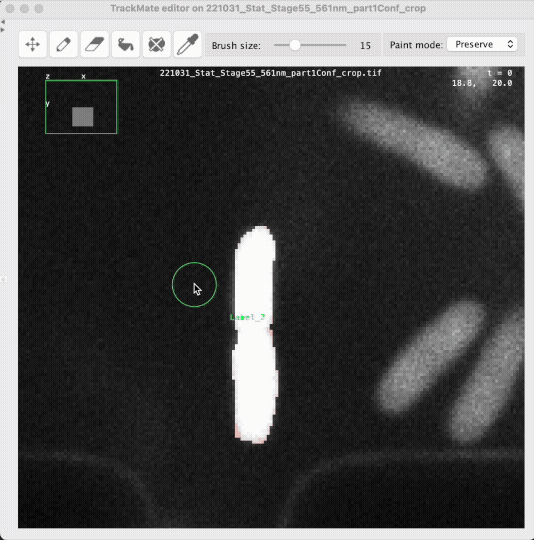
Paint preserve
This mode is the converse of the ‘Replace’ mode. The selected label will be applied only on the pixels that have no label already. It will only paint on the background. This is useful if you have close objects that you know are not overlapping.
Deleting pixels - F3
The delete tool also has several modes, that are made to harness possibly overlapping labels.
Delete all labels
This mode simply remove all labels at once. You get the background where you paint.
Delete selected label
With this mode, the brush will only remove the label currently selected, and no touch the others:
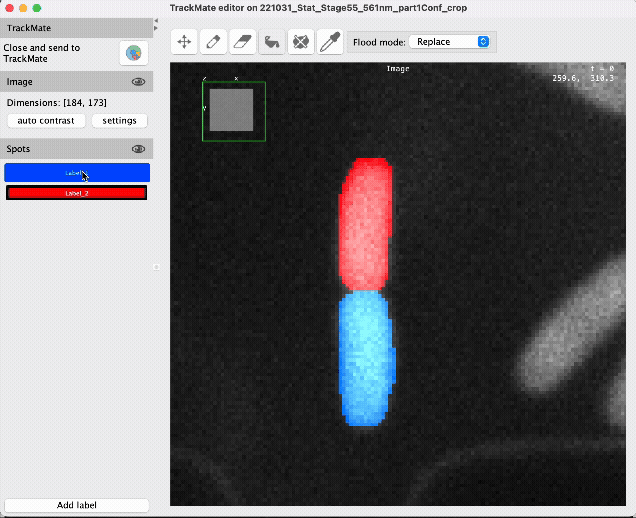
Flood fill - F4
This tool allows for painting over a ‘segment’ of the labeling. That is: any connected portion of the labels that have the same labels underneath. It is most useful to replace a label or add one. There is also two modes for this tool.
Flood fill replace
Similar to the Paint add tool, this leads to replace all the label of a segment with the selected label. On the animation below, the red part of the labeling is overwritten with the blue label, leading to a larger spot:
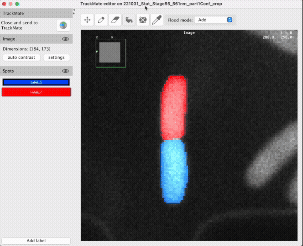
Flood fill add
This adds a label to a segment that might already have one. On the animation below, the red label is added to the blue segment. This segment has now two labels, the blue and the red, and it appers in magenta in the editor. After returning to TrackMate, this leads to two spots overlapping:
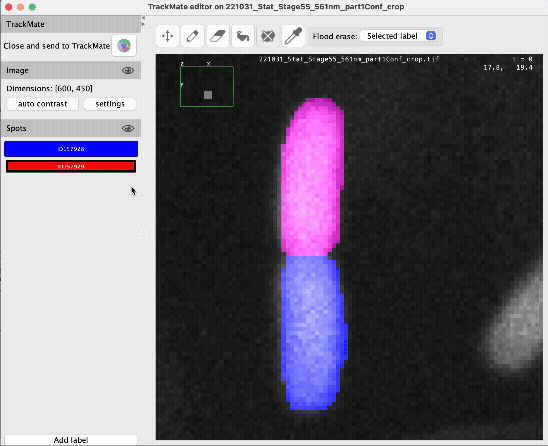
Flood erase - F5
This tool removes one or all labels of a segment.
Flood erase remove all
All the labels are removed from the segment. The modified pixels are now part of the background.

Flood erase selected label
Only the currently selected label is removed. For instance, on the animation below, the top segment has two labels, red and blue, and appears in magenta. The flood erase tool is used to remove the blue label from it, which leaves the red label.
Select label - F6
Click on any pixel to select its associated label. If the pixel contains multiple labels, click repeatedly to cycle through them.
Keyboard shortcuts changing the brush mode and size
Several keyboard shortcuts are available to speed up the editing process. First you can press F1, F2, F3, F4, F5 and F6 to switch between the Navigate, Add, Fill, Delete, Remove and Select modes, respectively. You can also use Q and , E to decrease and increase the brush size, respectively. Pressing ⇧ Shift + Q and ⇧ Shift + E will change the brush size by a larger amount.
Keyboard shortcuts for editing
You can also use the following keyboard shortcuts to directly edit in the image, without having to select a brush mode first. Put the brush in the Navigate mode (F1), and start editing with the following keys:
| Key | Action |
|---|---|
| A Left Click or ␣ Space + Left Click |
add pixels |
| D Left Click or ␣ Space + Right Click |
delete pixels |
| R Left Click |
remove entire spot |
| L Left Click |
fill holes |
| ⇧ Shift + Left Click |
select spot at mouse location |
| Q and E | decrease and increase the brush size |
| ⇧ Shift + Q and ⇧ Shift + E | decrease and increase the brush size faster |
| ␣ Space + Mouse Wheel or A + Mouse Wheel or D + Mouse Wheel |
change the brush size |
The default key bindings are chosen to match the edition of spots in the TrackMate UI. For adding, deleting, removing and filling spots, the keys must be used as modifiers, and kept pressed while you paint.
Passing the results to TrackMate
Once you are done editing, click the Close and send to TrackMate button in the top left side bar. This will close the editor and prompt you with the following dialog:
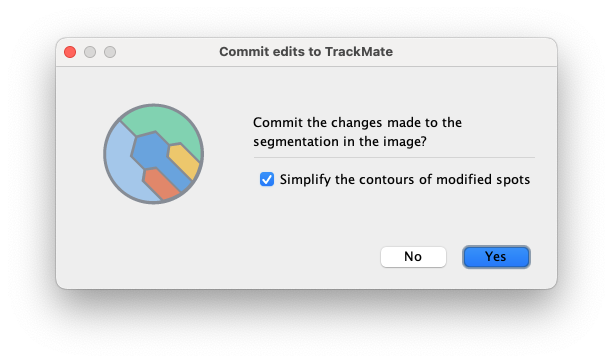
If you click No, your changes will be discarded. If you click Yes, the modified spots will be sent to TrackMate. If you selected the Simplify contours checkbox, the contours of the spots will be smoothed and simplified before being sent to TrackMate. This relies on the same routine that for the Simplify contours option found in most of the segmentation detectors in TrackMate, and explained here. Because the spot editing is done with a mask, it is recommended to use this option to avoid having jagged contours.
Tips and tricks
Editing a subset of the image
If the image is very large and you want to only edit a region, you can first draw a ROI in the image before launching the editor. Only the spots that are fully in the bounding box of the ROI will be sent to the editor.
Editing all time frames
The spot editor normally only edits the spots in the frame that is currently displayed in Fiji. However if you press the Shift while pressing the Launch spot editor button, all frames will be sent to the editor. This respects whether you have a ROI in the image or not.
Spots can be overlapping
In TrackMate, spots are represented as polygons, as as such they can overlap.
This is also the case in the spot editor.
See the Paint add mode above for instance.
Several spots can have the same label
In TrackMate, a single spot is of a single polygon. It cannot have holes, nor cannot be made of several disconnected polygons. For this reason, when you use one label in the editor to create multiple separated masks, they will appear as multiple spots in TrackMate.
Spots are reinserted in the tracks
When you edit a spot, it will be possibly reinserted in the TrackMate model, within the track it belonged to. If the edits generate masks that are too different from the initial spots, they will be considered as new spots, and the tracks will have to be corrected in TrackScheme.
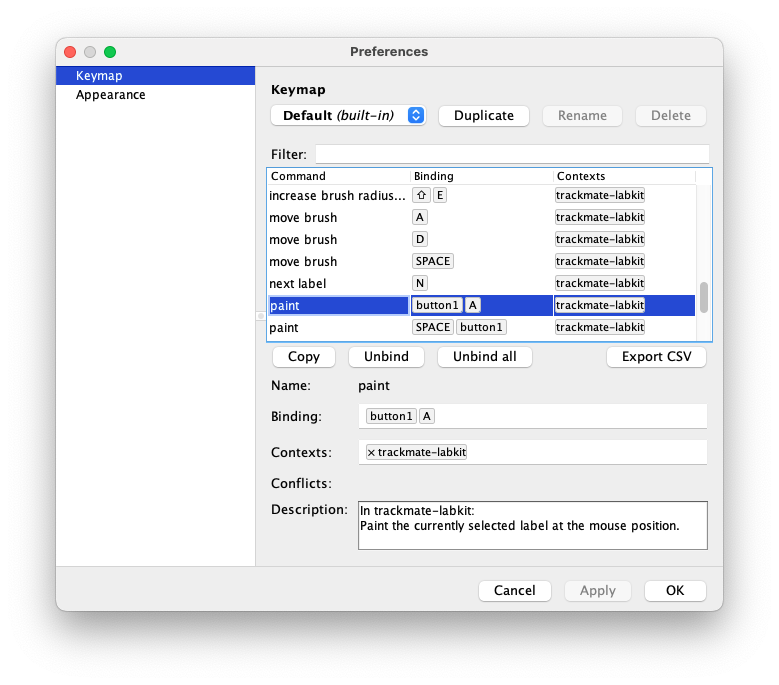
Key bindings are customizable
You can customize the key bindings of the spot editor in a dedicated dialog, displayed when you press ⌃ Ctrl + ,.
Closing the editor window
Has the same effect as clicking the Close and send to TrackMate button.
Other segmentation editor tools
We developed a segmentation editor tool in TrackMate, because we wanted it to be able to generate tracking ground-truth conveniently. There are however many segmentation editors, not necessarily made for tracking, available in the domain of biological imaging. We list some of them here:
Commercial
- Imaris ‘Surface’ objects can be edited manually, as 2D and 3D meshes.
- Arivis can be used for manual correction or creation of segmentation masks
- …
Open-source
- I have a (somewhat) biased likeness for Icy. Its mask editor is super convenient, can work in 2D / 3D and over time, and has undo / redo. Check the ROI cheat sheet
- The UI of QuPath is super convenient, and it also has undo / redo. The brush tool is particularly useful.
- Napari has a label layer that can be used to edit manually a segmentation mask, as above.
- In ImageJ, Thierry Pécot created the Annotater plugin to facilitate the creation of Deep Learning models.
- …
Jean-Yves Tinevez, August - December 2025