The content of this page has not been vetted since shifting away from MediaWiki. If you’d like to help, check out the how to help guide!
![]()
Overview
This is the ImageJ/Fiji plugin for StarDist, a cell/nuclei detection method for microscopy images with star-convex shape priors. The plugin can be used to apply already trained models to new images. See the main repository for links to our publications and the full-featured Python package that can also be used to train new models.
If you need any help, please first take a look at the StarDist documentation and frequently asked questions (FAQ).
If that doesn’t solve your issue, you can browse the existing stardist-tagged forum posts or search the image.sc forum. If you can’t find what you’re looking for, please create a new topic at the forum (and use the tag stardist).
If you open a new topic, please provide a clear and concise description to understand and ideally reproduce the issue you’re having.
Please only file an issue here for bug reports or if you have technical questions regarding the plugin.
The plugin currently only supports 2D image and time lapse data. If you have 3D data, please use our python library.
Installation
- Start Fiji (or download and install it from here first).
- Select
Help > Update...from the menu bar. - Click on the button
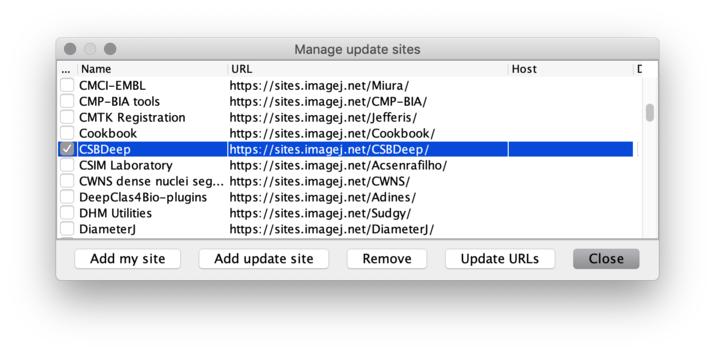
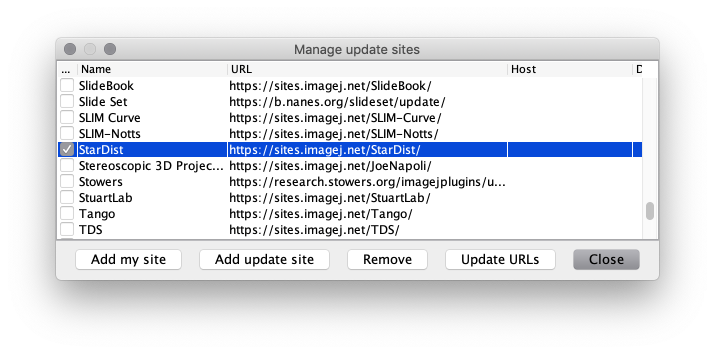
Manage update sites. - Scroll down the list and tick the checkboxes for update sites
CSBDeep,StarDistandTensorFlow, then click theClosebutton.
(IfStarDistis missing, clickUpdate URLsto refresh the list of update sites.)
- Click on
Apply changesto install the plugin. - Restart Fiji.
Usage
Plugin
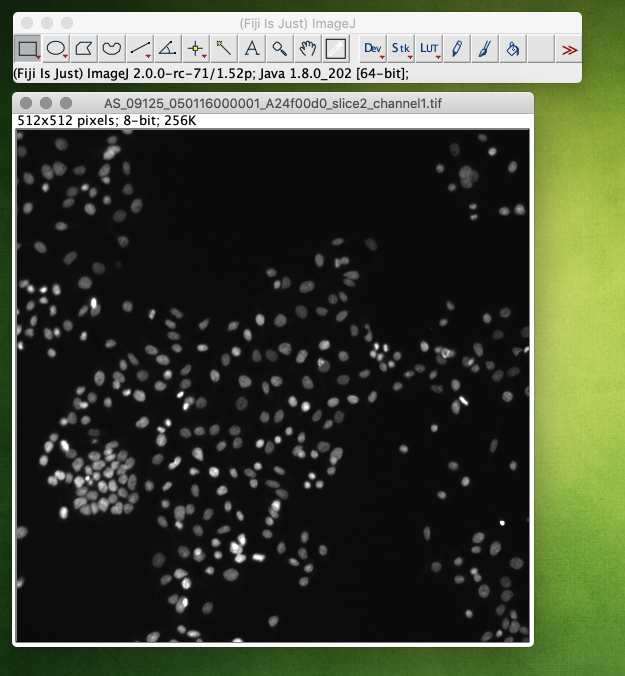
Open the image that should be segmented. Note, that currently only 2D and 2D+time images are supported. Suitable test images can for instance be found at the Broad Bioimage Benchmark Collection[1]:
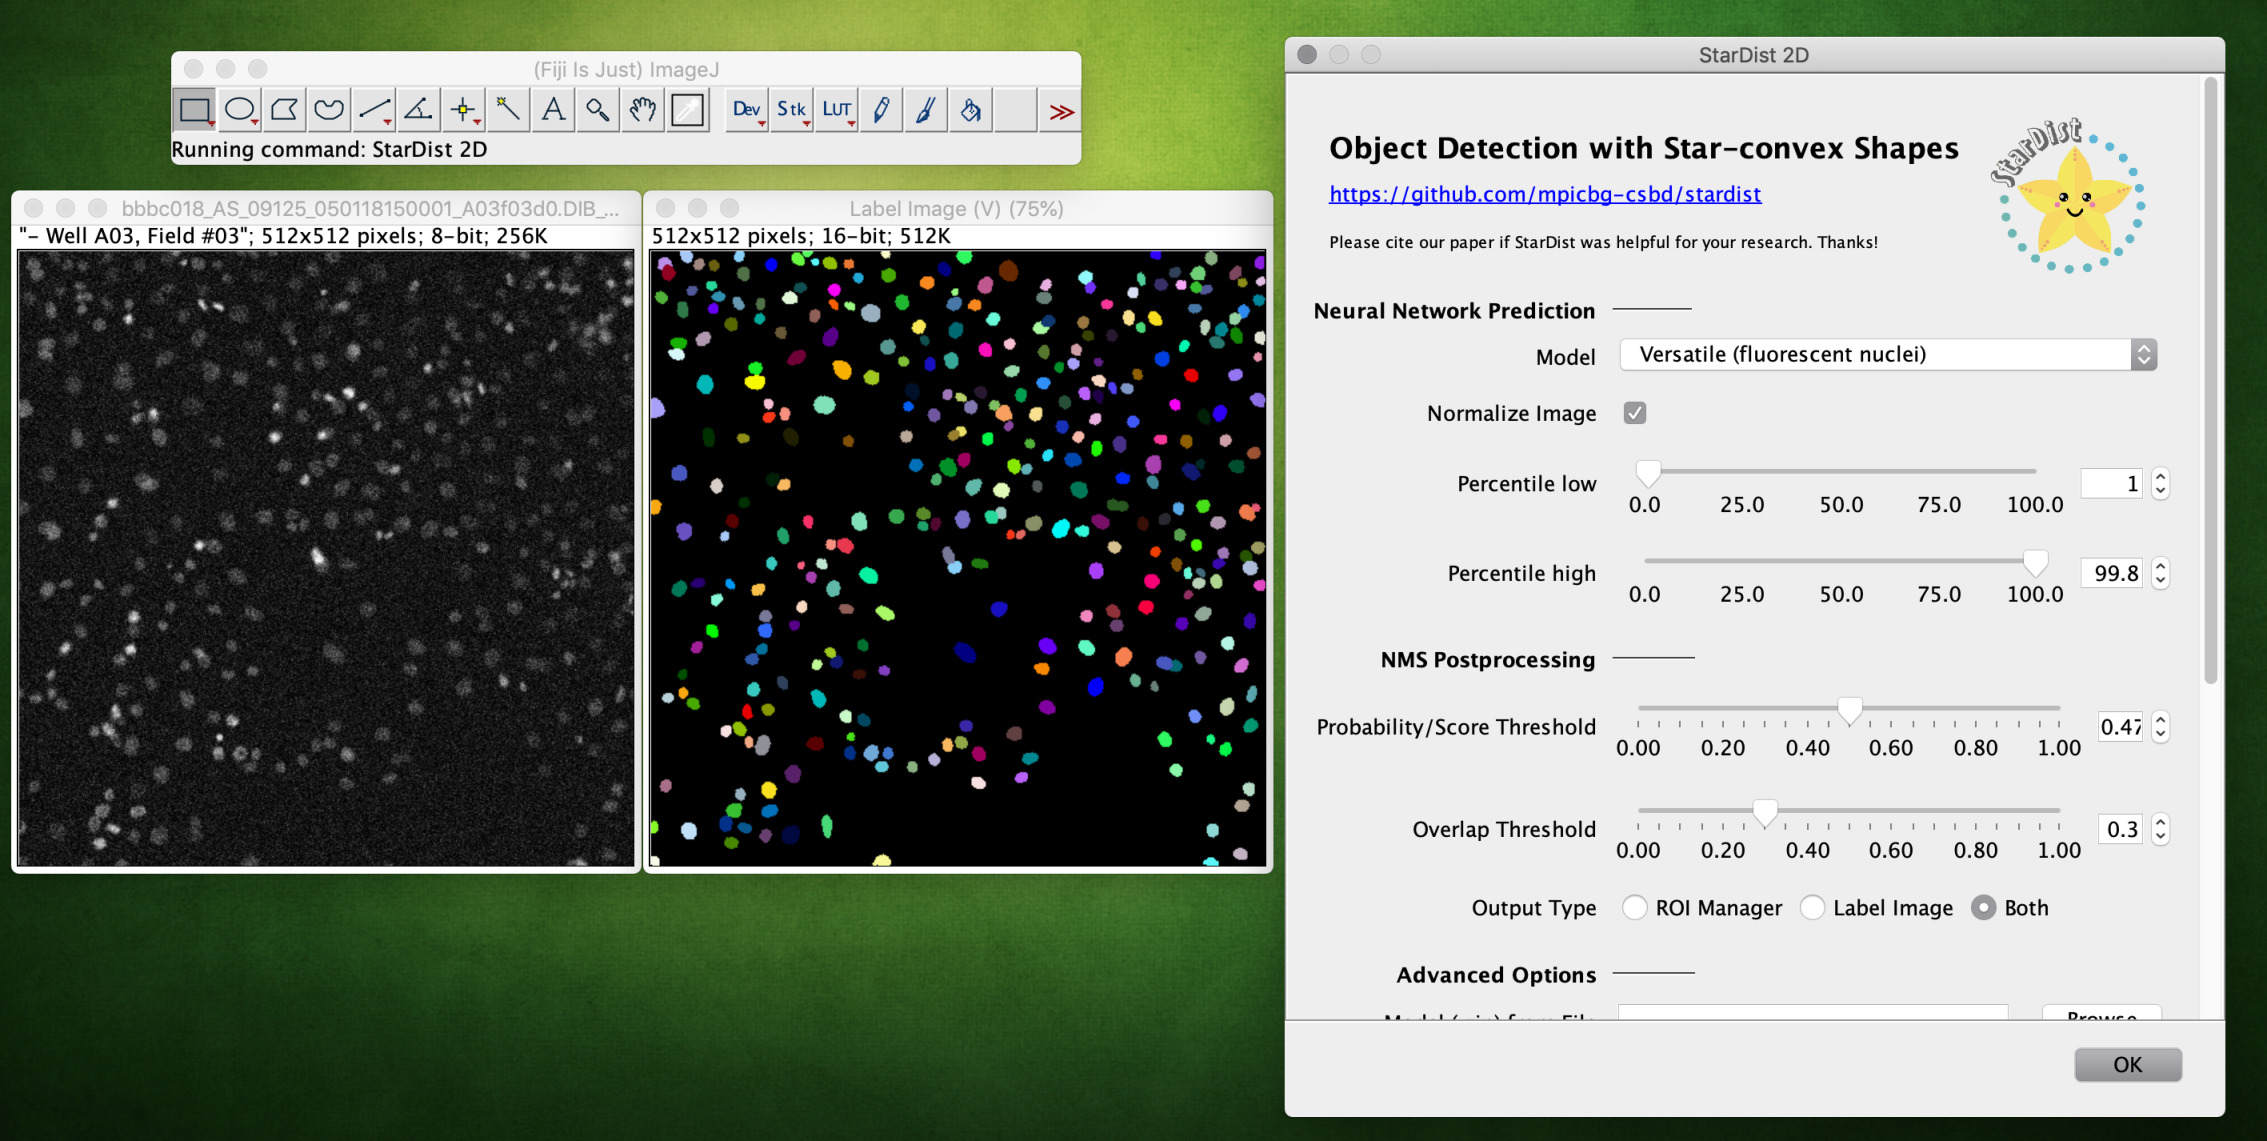
Start the plugin from Plugins > StarDist > StarDist 2D. The following parameters can be set:
|
|
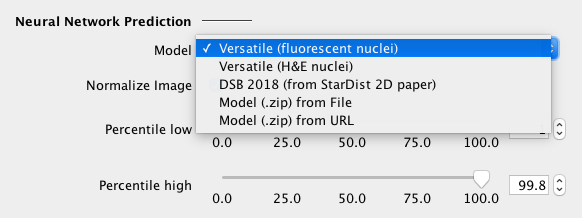
Select a neural network model from the dropdown list, which can be one of the following:
If necessary, one can change/disable the percentile-based input image normalization. |
|
|
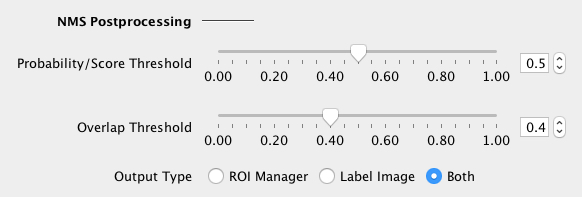
Adjust the NMS (non-maximum suppression) postprocessing parameters:
If in doubt, load the default NMS parameters of the selected built-in model (see below). The segmented objects can be returned as a Label Image or in the ROI Manager (or both). |
|
|
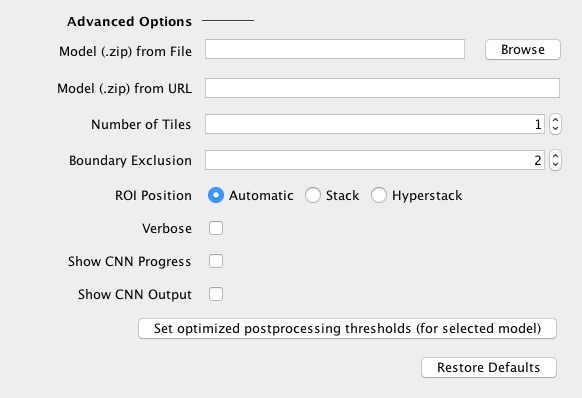
Advanced options:
|
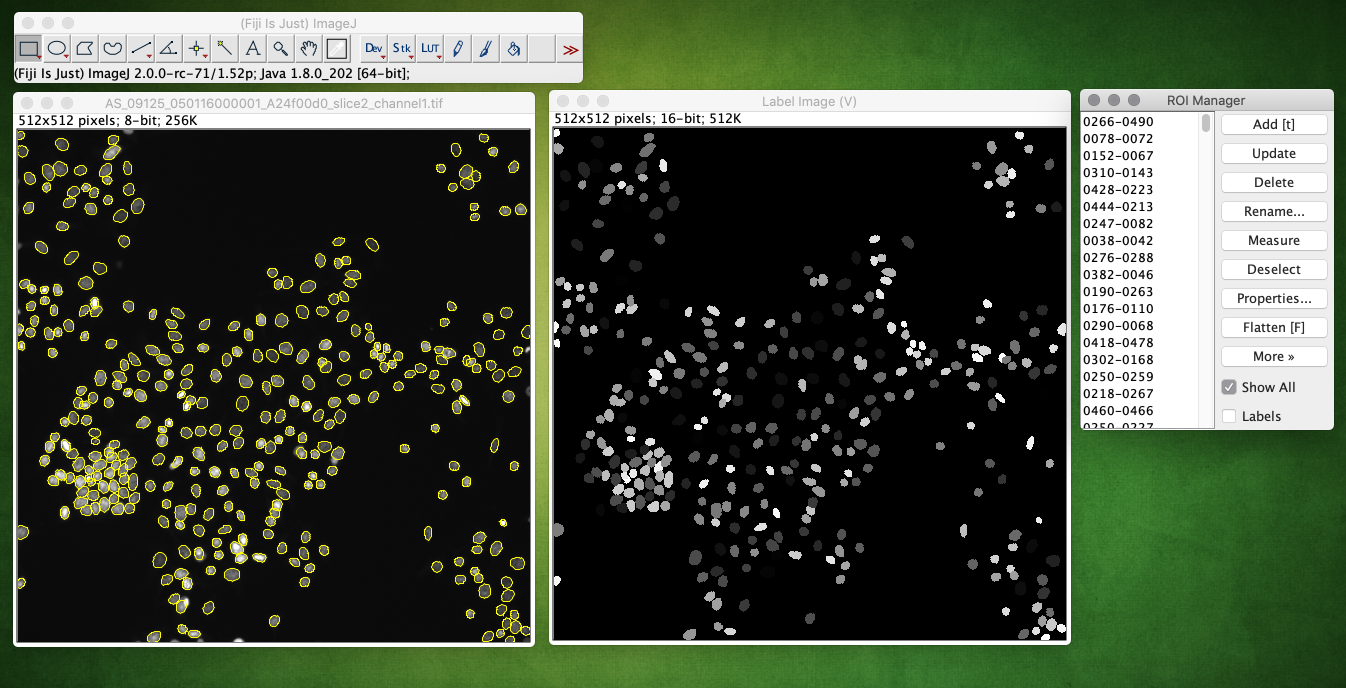
Example of running the plugin, showing the returned label image and ROIs overlaid on the input image (check Show All in the ROI Manager):
Scripting/Batch-Processing
Please have a look at the Fiji/Jython script batch-processing example that runs stardist on all files of a folder.
Citation
Please cite the paper if you are using the plugin in your research:
doi:10.1007/978-3-030-00934-2_30
References
[1] Caicedo et al., Nature Methods, 2019