To follow this tutorial, make sure the PTBIOP update site is enabled.
Create an orthoviewer
There is a bug : do not show the cross overlay to follow this tutorial.
Please follow these instructions to create a synchronized ortho bdv/bvv viewer. In short:
OPTIONAL link a BVV Ortho viewer, possible only with 16 bits data
- Create a bvv ortho viewer with synchronized states
- Synchronize the front view of the bvv and bdv ortho viewer
- Synchronize the states between the front view of the bvv and bdv ortho viewer
You should get these two windows:

Open the xml bdv dataset
Proceed as explained here.
If you need to register multiple images between them, you can add them in one viewer with a right-click in the tree view or
- with Plugins › BigDataViewer-Playground › BDV › BDV - Show Sources for bdv
- and Plugins › BigDataViewer-Playground › BVV › BVV - Show Sources for bvv
between their states are synchronized, the sources will appear in all windows.
Registration
Registering sources located in the same timepoint
TODO
Registering sources over time
If during an acquisition dataset a sudden jump is observed at a specific timepoint, it can be difficult to correct. Automated registration methods can fail because of the big discontinuity over time, and most manual methods are difficult to use: a single timepoint is usually displayed, and you can’t see the target location easily to correct for the position.
In the example below, we see such a sudden jump that occured when the Zebrafish embryo fell on its side:

It is possible with BigDataViewer-Playground to create an source which is just another existing source but shifted in time. This will be convenient to set the reference and fix the jump.
To make a time shifted source, go to Plugins › BigDataViewer-Playground › Sources › Create a time-shifted source. Select the reference source and set a negative value for the time shift (for instance -5). The time shifted source will appear in the tree view with the name that you have chosen. You can then change the color of the time shifted source Plugins › BigDataViewer-Playground › Sources › Display › Set Sources Color. In this example the original channel is magenta, and the time shifted source is green:

It is then possible to get a good reference when performing a manual registration correction. Place the bdv window at a timepoint where there is a significant difference between the source and the shifted one.
To register the sources manually, you then need to select ALL the source you need to correct. You can:
- select them in the tree view, right click, and then select the command
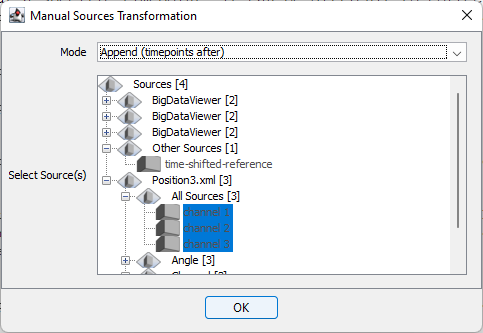
Manual Sources Transformation - you can do the same from the menu Plugins › BigDataViewer-Playground › Sources › Transform › Manual Sources Transformation, or in the search bar.
Do not pick only the channel you use for the alignement, because then only this one will be corrected. You also need to select the timepoints that will be corrected. If you select append, only the current timepoint displayed in the bigdataviewer window will be corrected. In the case documented here, we want to apply the same transform to all the later timepoints, because the embryo did not move after having fell off

After clicking ok, you enter the registration mode. A small window will appear which you can use to confirm the registration or to cancel it.

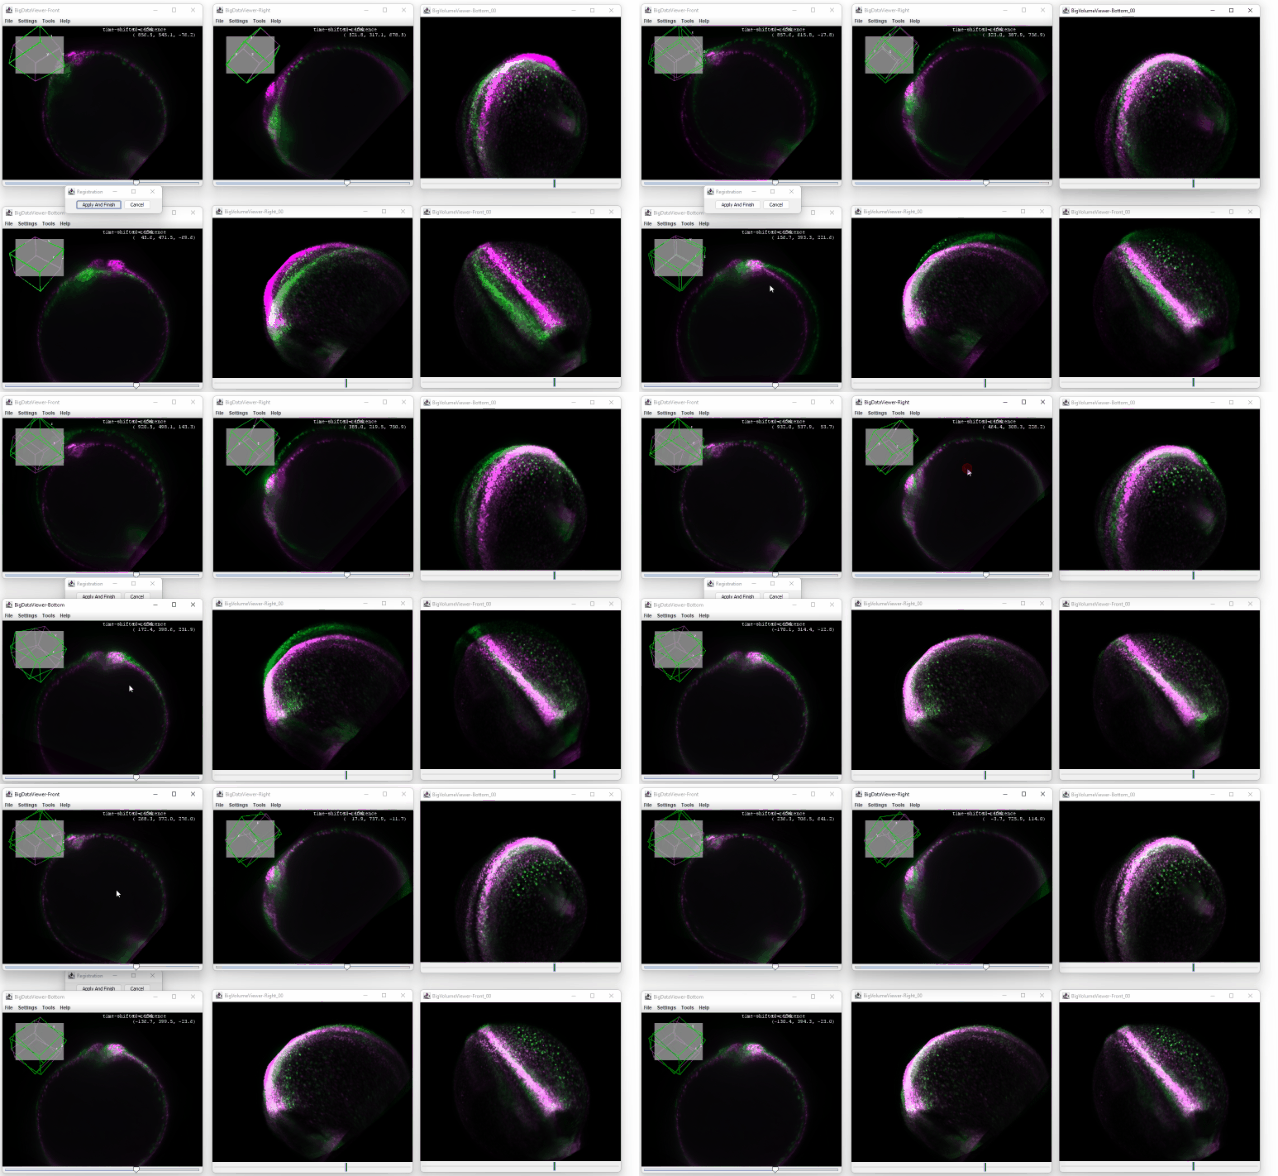
You can now move the sources in the orthoviewer and try to match the source with the time shifted one. The orthoviewer can help with that because you can translate and rotate in each viewer before confirming it:

Because the transformation is applied on all the later timepoints, the correction is propagated throughout the dataset, and no ‘big jump’ is visible anymore:

This dataset is now more suited for automated registration methods.
Re-saving the XML BDV dataset
Once the transformation is applied, the dataset needs to be resaved (preferably on a different location, to avoid losing the original dataset). This is done with Plugins › BigDataViewer-Playground › BDVDataset › Save BDVDataset. Select any source belonging to the dataset, set the path and name of a new non-existing XML file, and click run. This fixed dataset can be re-used in BigStitcher for instance.