A time-stamper plugin for ImageJ/Fiji
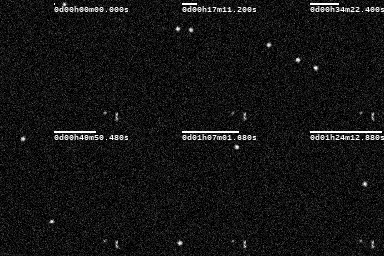
This plugin is intended for stacks with a temporal dimension (2D+T, 3D+T, etc.). Frames in the time series will be decorated with a timestamp and, optionally, a progressing bar.
Here’s a demo with the Tracks for TrackMate sample:

The plugin’s menu entry is next to the Scalebar entry: Analyze > Tools > Time Bar.... The configuration window that opens lets the user chose a few options:
- The progress bar can be disabled
- The time units can be replaced by symbols (ie:
3-23:15:42.695instead of3d23h15m42.695s) - The time format can be modified (
D-HH:MM:ss.SSSorD-HH:MMorHH:MM:ssorss.SSSand many more!) - A well suited time format is automatically selected based on the time interval and the total duration
- The time can be offset, such that the first frame displays a non-zero timecode (positive or negative)
And just like the scale bar :
- The progress bar thickness can be changed
- The font can be made Bold or Serif, the font size can be changed
- The location can be modified (all four corners, or at the selection)
- Font and background color can be changed
The frame interval information is extracted from the image’s metadata (Image > Properties... > Frame interval). Units in this field can be one of h/hr/hrs/hour/hours for hours, m/min/minute/minutes for minutes, s/sec/second/seconds for seconds, ms/milisecond/miliseconds for miliseconds.
How to install
You can add this Plugin to your ImageJ/Fiji installation either by configuring an Update Site in ImageJ/Fiji, or by installing it manually.
5 clicks procedure: the easiest way is to use the Update Site.
- As stated in the official ImageJ documentation, you can navigate in ImageJ’s menu to
Help > Update.... - Then click on the
Manage update sitesbutton. - In the list that opens, find the entry named Timebar and tick the checkbox.
- Fiji will now display the changes it has to perform to install the plugin. If the list is very long, I would recommend reading this page on ImageJ’s wiki. Otherwise, simply click on
Apply changes, restart ImageJ, and you’re done.
Manual installation: even-though the procedure is described with less steps, it requires more autonomy from your side. With this method, you can install any version of the plugin, but it will no be updated automatically by ImageJ.
- Head on to the Releases page here on GitHub.
- Download the
.jarfile for the latest version (or another one). - Copy this file into your ImageJ/Fiji plugins directory. This directory is located in your ImageJ/Fiji installation, but I cannot tell where that is as it depends on the systems.
- Restart ImageJ, and you’re done.