Important
This plugin is now deprecated and is replaced by a Napari plugin that computes dynamic instability paramerters from the Kymographs of Microtubule and Actin. Napari plugin: In this plugin user inputs the kymographs of microtubules and then use a UNET model to segment the kymograph edges and this Napari plugin computes the dynamic instability parameters. See the demo here
The MTrack plugin is one of several unrelated plugins with very similar names and functionality:
- Mtrack2 (~2009) is a plugin for tracking objects in 2D over time.
- MTrackJ is an ImageScience plugin to facilitate motion tracking and analysis.
- MTrack (~2018) is a plugin to detect, track, and measure microtubules in TIRF images.
- TrackMate is your buddy for your everyday tracking.
MTrack is a tool, which detects, tracks, and measures the behavior of fluorescently labeled microtubules imaged by TIRF (total internal reflection fluorescence) microscopy. In such an in vitro reconstitution approach, stabilized, non-dynamic microtubule seeds serve as nucleation points for dynamically growing microtubules.
MTrack detects microtubule seeds, tracks the growing microtubule ends and creates trajectories.
For using MTrack on movies which have very low signal to noise ratio you should create a denoised image to be used for segmentation and upload it along with the original movie. In this setting the microtubules pixels are identified from the segmentation movie while the actual measurement is always done on the original movie.
Installation
- Click Help › Update….
- Click the Manage update sites button.
- Select the MTrack update site in the list.
- Click Close and then click Apply changes.
- Restart Fiji.
- Launch the plugin with Plugins › Tracking › MTrack.
Usage
Microtubule Detection & Tracking
A typical dataset consists of a single two-dimensional (2d) image of the non-dynamic microtubule seeds followed by a 2d time-lapse of the dynamically growing microtubules. The file format can be any format readable by Fiji/Bioformats (.tif, .nd2, … ). To run the tracker select Plugins › MTrack › Microtubule Detection and Tracking
The welcome panel will open.
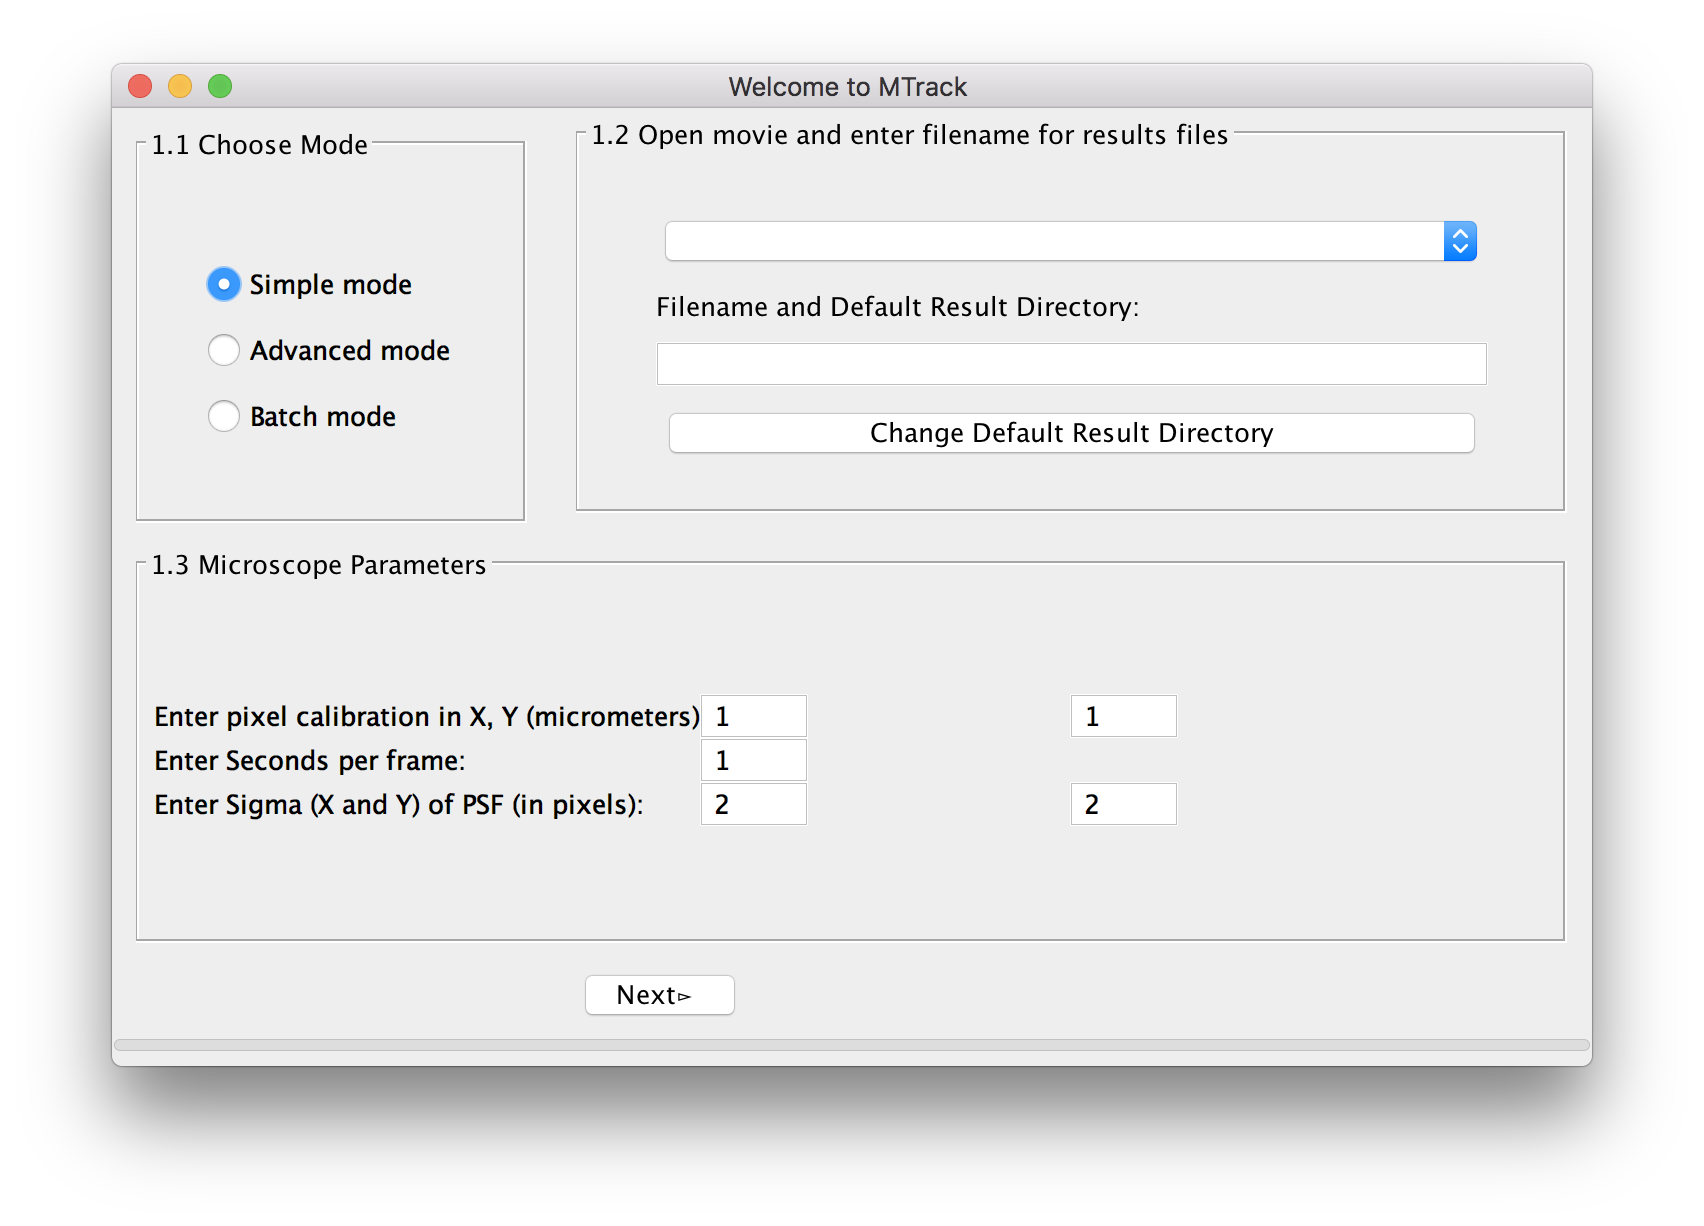
Choose Mode
For a first analysis of your data, we suggest using the simple mode, in which we have pre-selected a number of parameters. In case you are unsatisfied with the outcome of the tracking, you can use the advanced mode(MTrack) to fine-tune settings. When analyzing more than one movie, you can select batch mode(MTrack) and run many movies simultaneously. However, before running the program in batch mode, you have to at least run the program once in simple or advanced mode to select and save the required parameters.
The following intro is on simple mode.
Select Movie
Next, the user selects the movie. The movie to be uploaded is the original movie coming out of the microscope. In simple mode, the program will do a pseudo flat-field correction by default. This preprocessed movie will only be used for object recognition of seeds, not for end-point detection. End point detection will always be performed on the original image.
In the advanced mode, the user has the option to either perform a flat-field correction and apply a median filter of a chosen radius. Alternatively, the user can upload their own preprocessed movie. (Read more about Preprocessing(MTrack)).
For the movie type, choose one of the three supported options:
- Two channel image as hyper-stack (both channels in one image)
- Concatenated seed image followed by time-lapse images
- Single channel time-lapse images
Please choose an output file directory. The trajectory files will be written as .txt files. By default, trajectories will be saved in the current working directory with the name of the movie.
Microscope Parameters
The program automatically reads the metadata shown as pixel size (micrometer in x and y) and frame rate (in seconds). If the metadata can not be read properly, the user can manually add the values. In addition, the user is asked to enter the Sigma (X) and Sigma (Y) of the Point-Spread-Function (PSF) of the microscope in pixel units (see here for more explanation).
When you input any parameters, please ensure that you use decimal number formatting only.
Press Next to proceed. Three screens and one panel will open. They show the original movie, the preprocessed movie, and the “active image”, which represents the seeds and is typically the first frame of the movie. Every successfully recognized seed will be marked with a red ellipse.
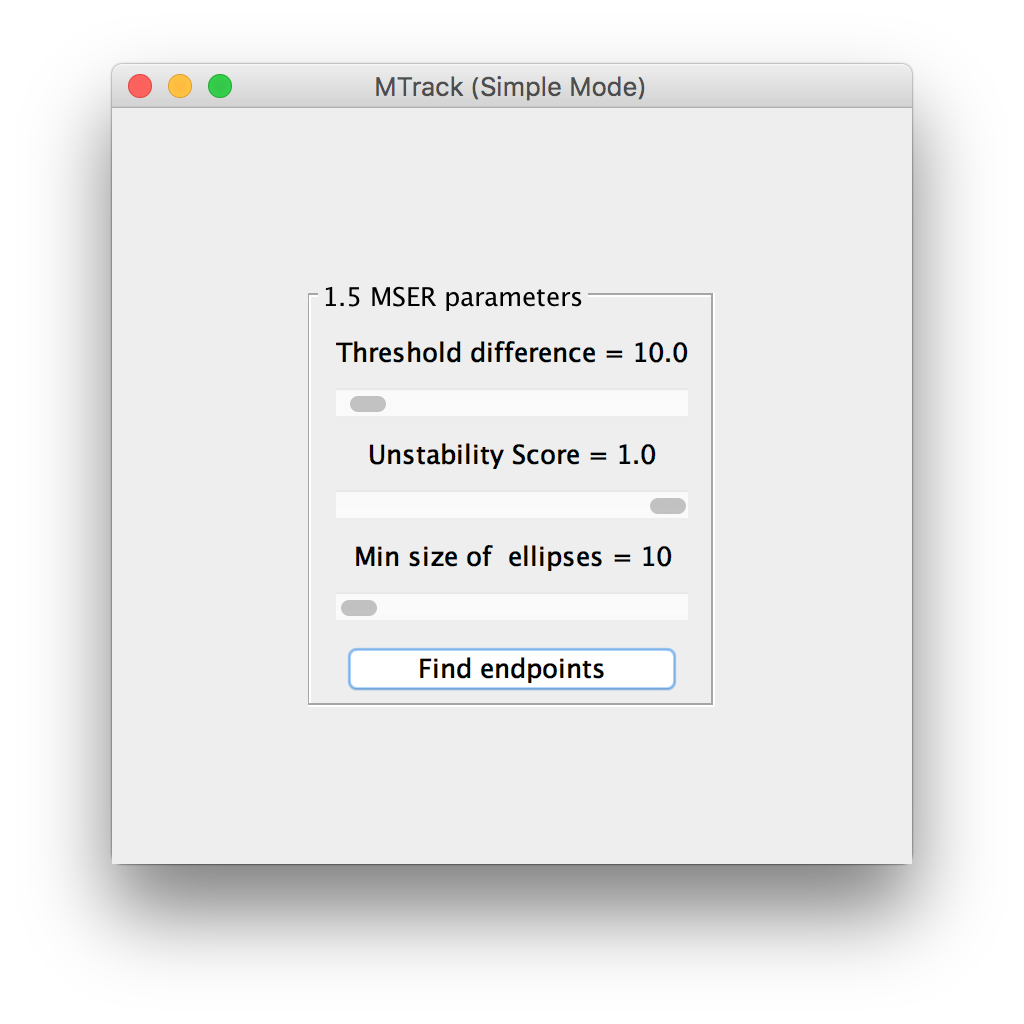
MSER parameters
The default algorithm to identify the seeds as objects is called Maximally Stable Extremal Regions (MSER)1. Read more about MSER parameters. If a single seed is not recognized or two very close seeds are recognized as one, the user can change the MSER parameters using the adjustable sliders. The effect will be displayed live on the “active image”. Once most seeds are correctly recognized as objects, click “Find endpoints” to detect the ends of each seed with sub-pixel accuracy.
The end-points will be displayed as green circles. A “Next” button appears on the panel, which allows the user to flip to the next panel.
Options
Before starting the actual tracking of the dynamically growing microtubules, the program will give you several options:
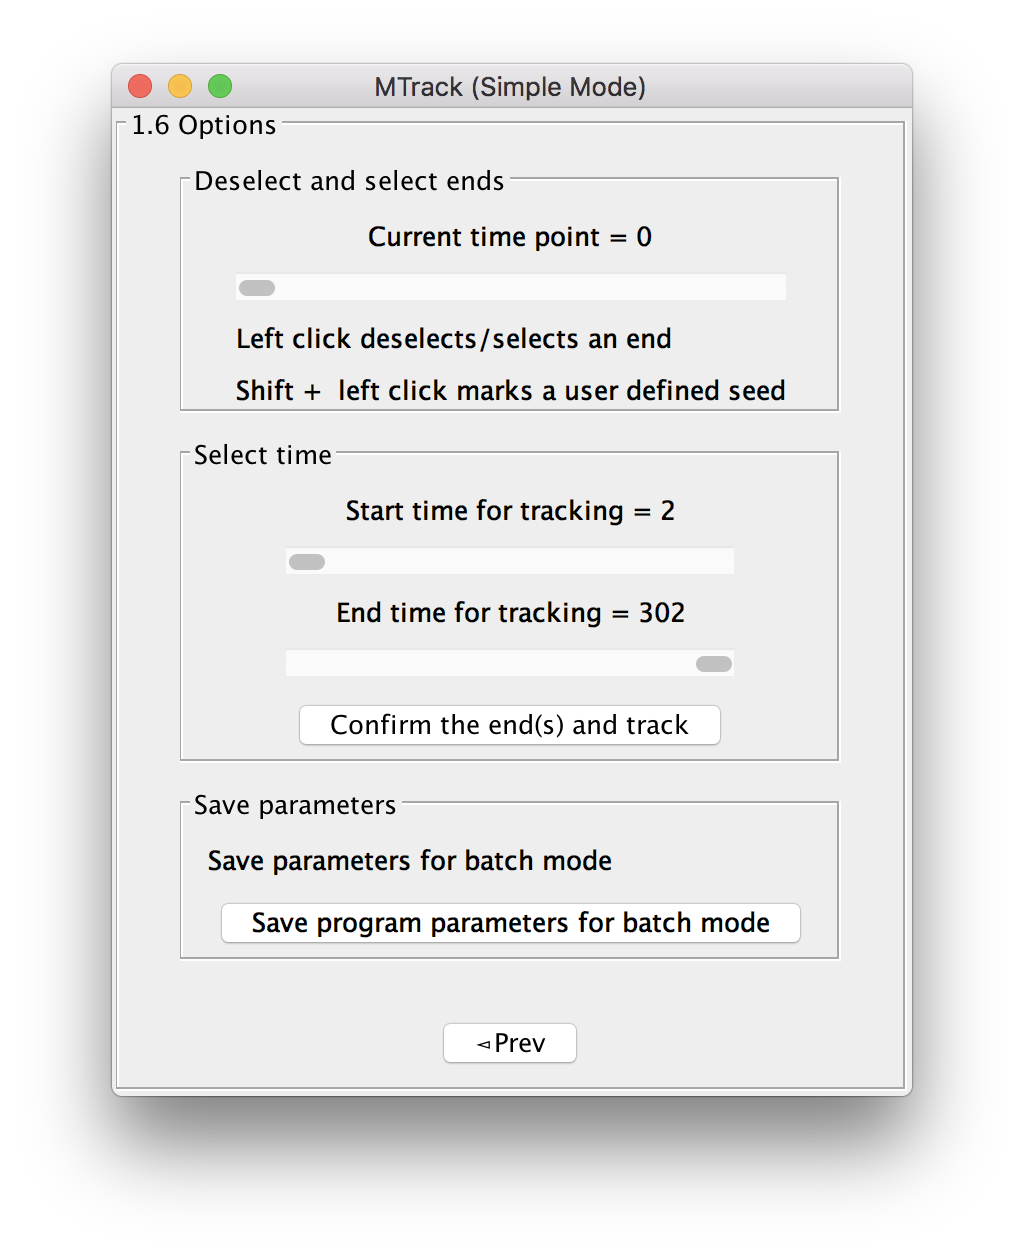
Deselect and select ends
In case an end has been wrongly recognized, the user can deselect an end by left clicking on it in the image. The program will remember and allow to re-select this end by clicking Shift + left click (pink circle will mark the end). In case an end has not been recognized, use Shift + Alt + left click to select a user defined end (orange circle will mark the end). Read more on microtubule polarity and (+) end vs. (-) end tracking.
Select time
The user can select the start and end time over which the tracking will be performed by entering the frame numbers. Click “Confirm ends and track” to perform the actual tracking, which will be performed “live” (progress bar will show).
Yellow ellipses mark seeds to be tracked, red ellipses mark seeds which won’t be tracked. Green circles mark ends to be tracked. Orange circles mark user defined ends that will be tracked. During tracking, a yellow crosshair will show the current position of the tracking on each marked microtubule. A “Success” frame will let you know about the end of the tracking. Two movies will be displayed, the “Track ID” movie, which can be used to link the trajectories to individual microtubules and an “Overlay movie”, in which the user can recapitulate the tracking. The trajectory of each end is individually saved as .txt file and numbered according to the track ID. Each trajectory will contain the following information: frame number, total microtubule length (in px and μm), track ID, x and y position (px and μm) and the length increment from the previous frame (px and µm). After successful tracking, the user has the option to save the selected ends, so that the movie can be run (again) in batch mode.
Citation
Please note that MTrack is available through Fiji, and is based on a publication. If you use it successfully for your research please be so kind to cite our work:
doi:10.1038/s41598-018-37767-1