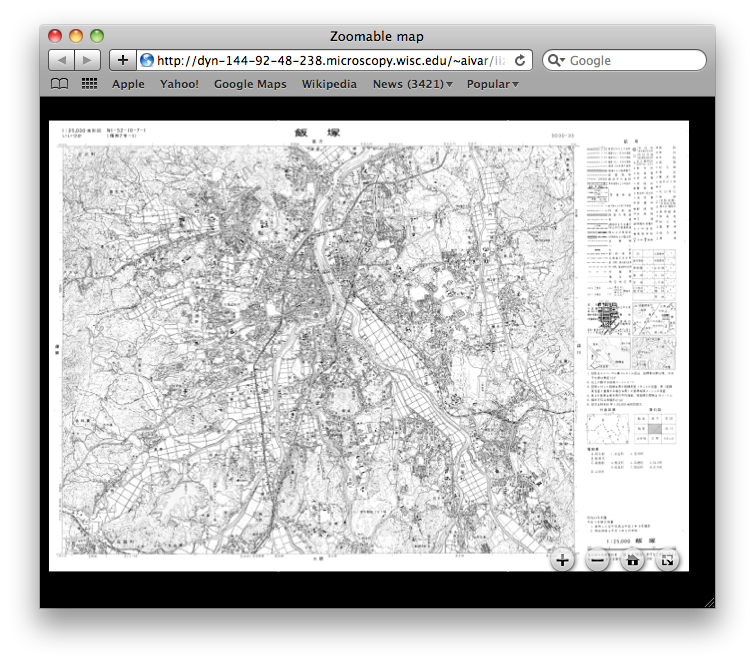

The Deep Zoom Plugin is useful for exporting a large image to the Deep Zoom format. It builds an HTML and an XML file and an associated collection of folders for different zoom levels containing image tiles. If these are created within or moved to a folder on a web server, the image can subsequently be viewed, zoomed, and panned over the ‘Net in a browser window. (It can also be viewed from the local filesystem in a browser window.)
It has also been useful as a testbed for developing ideas for a chained plugins architecture for ImageJ.
The current version uses Seadragon Ajax to display the zoomable pannable image. Deep Zoom ordinarily uses Microsoft’s Silverlight browser plugin for Windows and macOS; there is a Moonlight implementation available for Linux. It would be possible to have a checkbox to create a Silverlight version of the HTML, which might offer smoother zoom & pan.
This plugin uses BareBonesBrowserLaunch to launch a new browser window.
Limitations
The plugin currently has a bug in that it creates an excess number of levels, which are not needed for display.
Installation
The plugin can be downloaded from the SciJava Maven repository as loci:deep_zoom-plugin.
Copy the plugin jar to ImageJ’s plugins folder. Once restarted the plugin will appear in ImageJ’s menu at File › Save As… › Deep Zoom….
Description
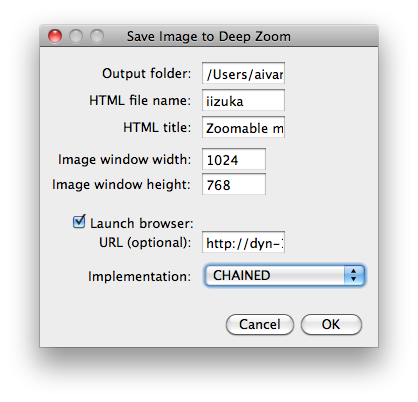
The first screenshot shows the user interface for the plugin:
- ‘Output folder’ is the folder on your local filesystem to build the Deep Zoom files and folders.
- ‘HTML file name’ is the name of the HTML file in the browser. Several HTML files may coexist in the same output folder.
- ‘HTML title’ will be the title of the window in a browser (which gets saved as a bookmark name).
- ‘Image window width’ and ‘Image window height’ specify the size of the image window in the browser.
- ‘Launch browser’ controls whether or not the plugin should pop up a browser to view the results.
- ‘URL (optional)’ can be used if your output folder is on a web server. Then the browser views the results from your web server.
- On my Mac I have my output folder set to ‘/Users/aivar/Sites’ and URL set to
http://0.0.0.0/~aivar. - The dropdown list for ‘Implementation’ is for experimental purposes (and will be removed from the final version of the plugin). For now the default ‘CHAINED’ option is best. To read more about the different implementations see below.
See also
These are implementation details of some of the experimental code in the plugin. This section is temporary and links are liable to get out of date.
The CHAINED, SINGLEINSTANCE, and MULTIINSTANCE ‘Implementation’ options exercise different experimental ways to chain chunks of code together. For this plugin there is a chunk of code that generates levels of the image by successively scaling the image in half. Another chunk takes a level version and splits it up into tiles. Another chunk takes a tile and writes it to the appropriate folder with the appropriate name.
With CHAINED each chunk is given the next chunk to send its output to. So execution proceeds on a single thread. Tiles are created, written out, the image is scaled down, and so on.
With SINGLEINSTANCE there is a single instance of each chunk which has its own thread to process images. Inputs and outputs of each chunk are named and chained together. There is a Java BlockingQueue for each chained image that funnels output images to inputs.
MULTIINSTANCE is similar to SINGLEINSTANCE except that every time a set of input images is available a new instance of the chunk, with its own thread, processes them.
The CHAINED code is here. SINGLEINSTANCE and MULTIINSTANCE both use the same package here. (There’s also some experimental workflow code in this project here, tested here. This creates a workflow/pipeline of components (chunks of code or plugins) with named input and output images chained together. A workflow may be a component. Workflows can be saved/restored to/from XML.)
(Currently both SINGLEINSTANCE and MULTIINSTANCE versions pop up the browser window before the file/folder structure is completely written. So to actually view the image in the browser you have to wait and refresh.)