This is an archive of the old MediaWiki-based ImageJ wiki. The current website can be found at imagej.net.
Labkit
| Labkit () | |
|---|---|
| Author | Matthias Arzt |
| Update site | Labkit |
| Maintainer | Matthias Arzt |
| Source | on GitHub |
Labkit is a plugin for:
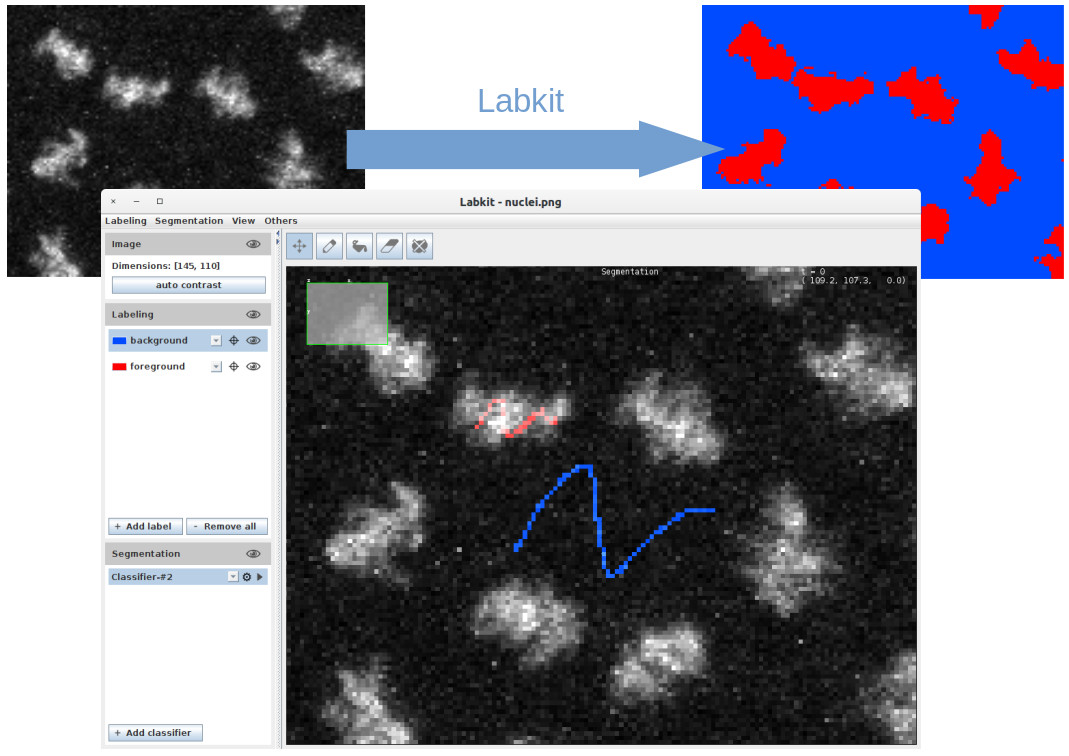
- automatic image segmentation
- labeling regions of an image
The automatic image segmentation functionality is comparable to Trainable Weka Segmenation, but it's better suited for large 3d images. And it has a nice Big Data Viewer based editor.
Contents
Installation
Labkit can be installed from the ImageJ update site: http://sites.imagej.net/Labkit/ (For details on how to install an update site click here.)
To start Labkit in ImageJ, first open the image you want to work with, and then select Plugins > Segmentation > Labkit from the main menu.
Quick Start
Follow these steps to segment an image:
- Open an image in ImageJ.
- Start Labkit by selecting "Plugins > Segmentation > Labkit" from the menu.
- Labkit should start and display the image. If it shows a black window instead of the image: Click S and adjust the contrast.
- Select "foreground" (In the side bar of Labkit). Select the pencil tool (top bar of Labkit) and draw on the image.
- Select "background" and the pencil tool, and mark some other region of the image as background.
- In the side bar of Labkit, under the heading "Segmentation" you will find an entry "Classifier #1". And next to it there is a play button (black triangle). Click it, to train the Classifier. After a moment you will see the automatic segmentation of your image.
- From Labkit's main menu select "Segmentation -> Show Segmentation Result in ImageJ", to export your segmentation into ImageJ.
Labkit is based on Big Data Viewer. Navigation the image works as in Big Data Viewer, and many short cuts work too. Click here for a description of the short cuts.
- ^ Ctrl+⇧ Shift+mouse-wheel to zoom in and out
- right-click+drag to move the image
- left-click+drag to rotate a 3d image
- mouse-wheel to scroll through the z-slices of a 3d image
Tips & Tricks
- If there's a black window, where the image should be? You might need to change the contrast settings: Click on the image, and then press S on the keyboard. A dialog shows up. Use it to adjust the contrast.
- There can be more than two labels, just click on the "Add label" button...
- Labels can be renamed, by double clicking on them.
- To change the label color, just click on the colored rectangle left of the labels name.
- D+mouse-wheel to change the size of the brush tool.
Drawing Tool Shortcuts
- D+left-click to draw with the pencil tool.
- E+left-click to erase with the pencil tool.
- F+left click to use the flood fill tool.
- R+left-click to remove a connected component.
- N - switch to next label
Open & Save - Import & Export
- Things you can save, open, import or export:
- Labeling - As *.tif or *.labeling
- Bitmap - (One layer of the labeling) As *.tif
- Classifier - As *.classifier, only Labkit is able to work with them.
- Segmentation result - As *.tif, or show to ImageJ
- Segmentation's probability Map - As *.tif, or show in ImageJ
- The word "Labeling" is used to refer to the colorfully displayed areas overlayed on top of the image.
- Labkit's file format for Labelings is *.labeling. It works greate for very large files with very few labels. (This file format is likely to be improved and changed in the future.)
- The labeling can be saved and opened as *.tif as well. (This is a good option for not to big images. And can be used by any other tool.)

