Installing 3rd party plugins
For users
- If the plugin is published on an ImageJ update site, you can run Help › Update then click the Manage update sites button to enable it. Not only does this install the plugins for you automatically, but you will also be notified of any updates whenever they are released.
- Otherwise, you can just drag 'n drop the plugin .jar file (from the Explorer, Finder or any file browser) into the plugins directory:
- This will ask you for the destination of the plugin, just hitting Save is safe.
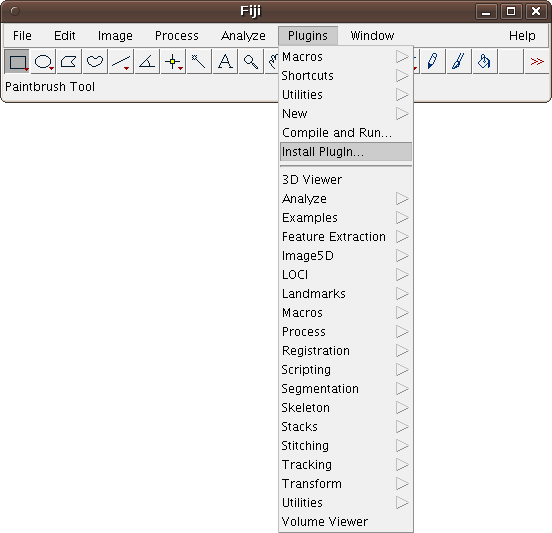
- Alternatively, use Plugins › Install Plugin...:
- It will ask you for the file name of the plugin, and install the given file.
- You can also copy the .jar, .class or .java files (or a script in any language Fiji supports) to Fiji.app/plugins/, followed by calling Help › Refresh Menus.
- Note: On MacOSX, you need to ^ Ctrl+click on the Fiji icon in the Finder and select Show package contents to see the plugins/ folder.
For developers
Please try to avoid closed-source plugins.
If you have the sources, copy them into src-plugins/. (If you do not have the sources, copy the .jar into staged-plugins/.)
Then, add a .config file in staged-plugins/ and type "./Build.sh". The plugin will be compiled and installed into plugins/.
Longer version:
The .config file should look something like this:
File, "Show Prime Numbers", Primes_("")
where File is the menu you want to add the item to -- at the moment, the only valid choices are Plugins, Plugins › <submenu>, File › Import, File › Save, Analyze › Tools, Help › About and Edit › Options.
Next comes the title of the menu item, and lastly the class name of the plugin with a parameter that will be passed to the run() method of that class. It must a fully qualified java name (e.g. com.sun.java.something) if the plugin belongs to a java package.
In other words, the .config file will become the plugins.config of the .jar file.
Please make sure that your .config file is designed such that the menus fit in snuggly with the common Fiji menu structure.
Then just "make", and the plugin will be automatically installed.


